Android NDK编程入门笔记
为何要用到NDK?
前段时间,工作中需要用android的应用程序访问android的根文件系统中的文件,但是由于应用程序的权限限制,无法访问这些文件,怎么办? 所以这就要用到了NDK编程了,既用C/C++代码实现访问系统文件,并将其生成本地库,供android中的java代码调用,这样就可以在java代码中通过调用C/C++编写的库的接口来实现对系统文件的访问。
下面就介绍下Android NDK的入门学习过程:
入门的最好办法就是学习Android自带的例子, 这里就通过学习Android的NDK自带的demo程序:hello-jni来达到这个目的。
代码的编写
1.首先是写java代码
建立一个Android应用工程HelloJni,创建HelloJni.java文件:
HelloJni.java :
/* * Copyright (C) 2009 The Android Open Source Project * * Licensed under the Apache License, Version 2.0 (the "License"); * you may not use this file except in compliance with the License. * You may obtain a copy of the License at * * http://www.apache.org/licenses/LICENSE-2.0 * * Unless required by applicable law or agreed to in writing, software * distributed under the License is distributed on an "AS IS" BASIS, * WITHOUT WARRANTIES OR CONDITIONS OF ANY KIND, either express or implied. * See the License for the specific language governing permissions and * limitations under the License. */package com.example.hellojni;import android.app.Activity;import android.widget.TextView;import android.os.Bundle;public class HelloJni extends Activity{ /** Called when the activity is first created. */ @Override public void onCreate(Bundle savedInstanceState) { super.onCreate(savedInstanceState); /* Create a TextView and set its content. * the text is retrieved by calling a native * function. */ TextView tv = new TextView(this); tv.setText( stringFromJNI() ); setContentView(tv); } /* A native method that is implemented by the * 'hello-jni' native library, which is packaged * with this application. */ public native String stringFromJNI(); /* This is another native method declaration that is *not* * implemented by 'hello-jni'. This is simply to show that * you can declare as many native methods in your Java code * as you want, their implementation is searched in the * currently loaded native libraries only the first time * you call them. * * Trying to call this function will result in a * java.lang.UnsatisfiedLinkError exception ! */ public native String unimplementedStringFromJNI(); /* this is used to load the 'hello-jni' library on application * startup. The library has already been unpacked into * /data/data/com.example.HelloJni/lib/libhello-jni.so at * installation time by the package manager. */ static { System.loadLibrary("hello-jni"); }}这段代码很简单,注释也很清晰,这里只提两点:
a:static{System.loadLibrary("hello-jni");}表明程序开始运行的时候会加载hello-jni, static区声明的代码会先于onCreate方法执行。如果你的程序中有多个类,而且如果HelloJni这个类不是你应用程序的入口,那么hello-jni(完整的名字是libhello-jni.so)这个库会在第一次使用HelloJni这个类的时候加载。b:public native String stringFromJNI();public native String unimplementedStringFromJNI();可以看到这两个方法的声明中有 native 关键字, 这个关键字表示这两个方法是本地方法,也就是说这两个方法是通过本地代码(C/C++)实现的,在java代码中仅仅是声明。用eclipse编译该工程,生成相应的.class文件,这步必须在下一步之前完成,因为生成.h文件需要用到相应的.class文件。
2. 编写相应的C/C++代码
刚开始学的时候,有个问题会让人很困惑,相应的C/C++代码如何编写,函数名如何定义? 这里讲一个方法,利用javah这个工具生成相应的.h文件,然后根据这个.h文件编写相应的C/C++代码。
2.1 生成相应.h文件:
就拿我这的环境来说,首先在终端下进入刚刚建立的HelloJni工程的目录:
/* DO NOT EDIT THIS FILE - it is machine generated */#include <jni.h>/* Header for class com_example_hellojni_HelloJni */#ifndef _Included_com_example_hellojni_HelloJni#define _Included_com_example_hellojni_HelloJni#ifdef __cplusplusextern "C" {#endif/* * Class: com_example_hellojni_HelloJni * Method: stringFromJNI * Signature: ()Ljava/lang/String; */JNIEXPORT jstring JNICALL Java_com_example_hellojni_HelloJni_stringFromJNI (JNIEnv *, jobject);/* * Class: com_example_hellojni_HelloJni * Method: unimplementedStringFromJNI * Signature: ()Ljava/lang/String; */JNIEXPORT jstring JNICALL Java_com_example_hellojni_HelloJni_unimplementedStringFromJNI (JNIEnv *, jobject);#ifdef __cplusplus}#endif#endif
上面代码中的JNIEXPORT 和 JNICALL 是jni的宏,在android的jni中不需要,当然写上去也不会有错。
从上面的源码中可以看出这个函数名那是相当的长啊。。。。 不过还是很有规律的, 完全按照:java_pacakege_class_mathod 形式来命名。
也就是说:
Hello.java中 stringFromJNI() 方法对应于 C/C++中的 Java_com_example_hellojni_HelloJni_stringFromJNI() 方法HelloJni.java中的 unimplementedStringFromJNI() 方法对应于 C/C++中的 Java_com_example_hellojni_HelloJni_unimplementedStringFromJNI() 方法
注意下其中的注释:
/* * Copyright (C) 2009 The Android Open Source Project * * Licensed under the Apache License, Version 2.0 (the "License"); * you may not use this file except in compliance with the License. * You may obtain a copy of the License at * * http://www.apache.org/licenses/LICENSE-2.0 * * Unless required by applicable law or agreed to in writing, software * distributed under the License is distributed on an "AS IS" BASIS, * WITHOUT WARRANTIES OR CONDITIONS OF ANY KIND, either express or implied. * See the License for the specific language governing permissions and * limitations under the License. * */#include <stdio.h>#include <errno.h>#include <stdlib.h>#include <string.h>#include <android/log.h>#include <jni.h>#include "com_example_hellojni_HelloJni.h"/* This is a trivial JNI example where we use a native method * to return a new VM String. See the corresponding Java source * file located at: * * apps/samples/hello-jni/project/src/com/example/HelloJni/HelloJni.java */jstringJava_com_example_hellojni_HelloJni_stringFromJNI( JNIEnv* env, jobject thiz ){ __android_log_print(ANDROID_LOG_INFO,"***********","***********"); return (*env)->NewStringUTF(env, "Hello from JNI !");}
这里只是实现了Java_com_example_hellojni_HelloJni_stringFromJNI方法,而 Java_com_example_hellojni_HelloJni_unimplementedStringFromJNI 方法并没有实现,因为在HelloJni.java中只调用了stringFromJNI()方法,所以unimplementedStringFromJNI()方法没有实现也没关系,不过建议最好还是把所有java中定义的本地方法都实现了,写个空函数也行啊。。。有总比没有好。
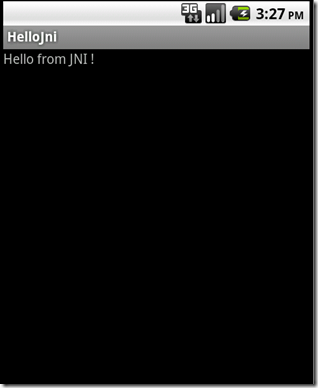
Java_com_example_hellojni_HelloJni_stringFromJNI() 函数只是简单的返回了一个内容为 "Hello from JNI !" 的jstring对象(对应于java中的String对象)。
hello-jni.c文件已经编写好了,现在可以把com_example_hellojni_HelloJni.h文件给删了,当然留着也行,只是我还是习惯把不需要的文件给清理干净了。
3. 编译hello-jni.c 生成相应的库
3.1 编写Android.mk文件
在jni目录下(即hello-jni.c 同级目录下)新建一个Android.mk文件,Android.mk文件是Android 的 makefile文件,内容如下:
# Copyright (C) 2009 The Android Open Source Project## Licensed under the Apache License, Version 2.0 (the "License");# you may not use this file except in compliance with the License.# You may obtain a copy of the License at## http://www.apache.org/licenses/LICENSE-2.0## Unless required by applicable law or agreed to in writing, software# distributed under the License is distributed on an "AS IS" BASIS,# WITHOUT WARRANTIES OR CONDITIONS OF ANY KIND, either express or implied.# See the License for the specific language governing permissions and# limitations under the License.#LOCAL_PATH := $(call my-dir)include $(CLEAR_VARS)#包含下边这两句就可以调用__android_log_print往Log中输出日志LOCAL_C_INCLUDES := $(LOCAL_PATH)/include LOCAL_LDLIBS += -L$(SYSROOT)/usr/lib -llog LOCAL_MODULE := hello-jniLOCAL_SRC_FILES := hello-jni.cinclude $(BUILD_SHARED_LIBRARY)
这个Androd.mk文件很短,下面我们来逐行解释下:
LOCAL_PATH := $(call my-dir)
iaiai@ubuntu:~/workspace/android/NDK/hello-jni/jni$ cd ..iaiai@ubuntu:~/workspace/android/NDK/hello-jni$ lsAndroidManifest.xml assets bin default.properties gen jni libs obj res srcbraincol@ubuntu:~/workspace/android/NDK/hello-jni$ ndk-build Gdbserver : [arm-linux-androideabi-4.4.3] libs/armeabi/gdbserverGdbsetup : libs/armeabi/gdb.setupInstall : libhello-jni.so => libs/armeabi/libhello-jni.so
可以看到已经正确的生成了libhello-jni.so共享库了, 我们去 libs/armeabi/ 目录下看看:
iaiai@ubuntu:~/workspace/android/NDK/hello-jni$ cd libs/iaiai@ubuntu:~/workspace/android/NDK/hello-jni/libs$ lsarmeabiiaiai@ubuntu:~/workspace/android/NDK/hello-jni/libs$ cd armeabi/iaiai@ubuntu:~/workspace/android/NDK/hello-jni/libs/armeabi$ lsgdbserver gdb.setup libhello-jni.so
4. 在eclipse重新编译HelloJni工程,生成apk
在eclipse中刷新下HelloJni工程,重新编译生成apk,libhello-jni.so共享库会一起打包在apk文件内。
在模拟器中看看运行结果: