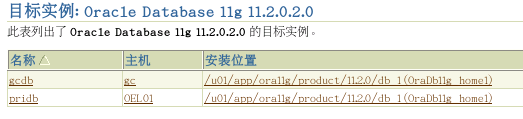
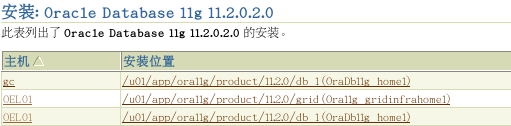
Oracle Grid control 11g及Active DataGuard 11g安装部署(二)
安装主库各种补丁
setup new op
[oracle@gc op]$ ll
总计 29688
drwxrwxr-x 8 oracle oinstall 4096 03-23 19:24 OPatch
-rw-r--r-- 1 oracle oinstall 30358026 04-12 17:57 p6880880_112000_Linux-x86-64.zip
[root@gc ~]# cd /u01/app/ora11g/product/11.2.0/ db_1/OPatch
[root@gc OPatch]# cd ..
[root@gc grid]# pwd
/u01/app/ora11g/product/11.2.0/db_1
[root@gc db_1]# mv OPatch OPatch.b
[oracle@gc op]$ pwd
/112db/psu/op
[oracle@gc op]$ mv OPatch /u01/app/ora11g/product/11.2.0/db_1/
[oracle@gc op]$
[oracle@ptest OPatch]$ export ORACLE_HOME=/u01/app/ora11g/product/11.2.0/ db_1/
[root@gc OPatch]# ./opatch version
Invoking OPatch 11.2.0.1.5
OPatch Version: 11.2.0.1.5
OPatch succeeded.
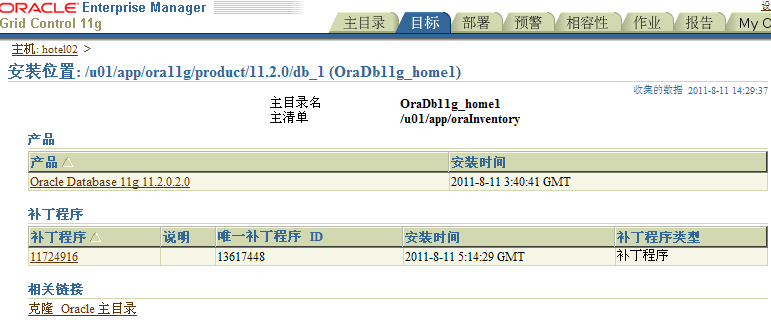
安装 oracle software PSUPatch 12419331(11724916)
[oracle@gc 2419331]$ pwd
/112db/psu/db/2419331
[oracle@gc 2419331]$ /u01/app/ora11g/product/11.2.0/grid/OPatch/./opatch apply
Invoking OPatch 11.2.0.1.5
check Patch 12419331(11724916)[oracle@gc OPatch]$ ./opatch lsinventory
Invoking OPatch 11.2.0.1.5
安装GIPSU (Grid Infrastructure Patch Set Update)
ready for setup
[oracle@gc bin]$ ./crs_stop -all
[oracle@gc bin]$ ./crs_stat -t
名称类型目标状态主机
------------------------
ora.DATA.dg ora....up.type OFFLINE OFFLINE
ora....ER.lsnr ora....er.type OFFLINE OFFLINE
ora.asm ora.asm.type OFFLINE OFFLINE
ora.cssd ora.cssd.type OFFLINE OFFLINE
ora.diskmon ora....on.type OFFLINE OFFLINE
ora.evmd ora.evm.type OFFLINE OFFLINE
ora.ons ora.ons.type OFFLINE OFFLINE
0216: 无法停止资源 'ora.ons'。
[oracle@gc bin]$ ./crsctl stop has
CRS-4133: Oracle High Availability Services已停止。
[oracle@gc bin]$ ./crs_stat -t
CRS-0184: 无法与 CRS守护程序通信。
Set GI psu start
[oracle@hotel01 gi]$ pwd
/112db/psu/gi
[oracle@ hotel01 gi]$ ll
drwxrwxr-x 4 oracle oinstall 4096 04-06 00:14 11724916
drwxr-xr-x 5 oracle oinstall 4096 04-06 00:13 12311357
-rw-r--r-- 1 oracle oinstall 422 04-06 00:14 bundle.xml
-rw-r--r-- 1 oracle oinstall 242833091 04-20 11:19 p12311357_112020_Linux-x86-64.zip
-rw-rw-r-- 1 oracle oinstall 103211 04-19 12:24 README.html
-rw-r--r-- 1 oracle oinstall 21 04-06 00:14 README.txt
[oracle@hotel01 gi]$
Root user:
[root@hotel01 ~]cd /u01/app/ora11g/product/11.2.0/
[root@hotel01 11.2.0]# ll
drwxrwxr-x 2 oracle oinstall 4096 06-03 09:53 db_1
drwxr-x--- 67 root oinstall 4096 06-03 11:42 grid
[root@hotel01 11.2.0]# chown -R oracle:oinstall grid
oracle user:
[oracle@hotel01~]export ORACLE_HOME=/u01/app/ora11g/product/11.2.0/grid
[oracle@hotel01 OPatch]$ pwd
/u01/app/ora11g/product/11.2.0/db_1/OPatch
Patch 12419353(12311357)[oracle@hotel01 OPatch]$ ./opatch napply -oh /u01/app/ora11g/product/11.2.0/grid -local /112db/psu/gi/12419353
Invoking OPatch 11.2.0.1.5
Oracle 中间补丁程序安装程序版本 11.2.0.1.5
版权所有 (c) 2010, Oracle Corporation。保留所有权利。
UTIL session
Oracle 主目录 : /u01/app/ora11g/product/11.2.0/grid
主产品清单: /u01/app/oraInventory
从 : /etc/oraInst.loc
OPatch 版本 : 11.2.0.1.5
OUI 版本 : 11.2.0.2.0
OUI 位置 : /u01/app/ora11g/product/11.2.0/grid/oui
日志文件位置 : /u01/app/ora11g/product/11.2.0/grid/cfgtoollogs/opatch/opatch2011-06-03_11-51-04上午.log
Patch history file: /u01/app/ora11g/product/11.2.0/grid/cfgtoollogs/opatch/opatch_history.txt
Invoking utility "napply"
Checking conflict among patches...
Checking if Oracle Home has components required by patches...
Checking conflicts against Oracle Home...
OPatch continues with these patches: 12419353
是否继续? [y|n]
y
User Responded with: Y
Running prerequisite checks...
提供电子邮件地址以用于接收有关安全问题的通知,安装 Oracle Configuration Manager并启动它。如果您使用 My Oracle
Support 电子邮件地址/用户名,操作将更简单。
有关详细信息, 请访问 http://www.oracle.com/support/policies.html。
电子邮件地址/用户名:
尚未提供电子邮件地址以接收有关安全问题的通知。
是否不希望收到有关安全问题 (是 [Y],否 [N]) [N]的通知: Y
您选择了 -local 选项, 因此 OPatch将仅对本地系统打补丁。
请关闭本地系统上在此 ORACLE_HOME之外运行的 Oracle实例。
(Oracle 主目录 = '/u01/app/ora11g/product/11.2.0/grid')
本地系统是否已准备打补丁? [y|n]
y
User Responded with: Y
正在备份受补丁程序 'NApply'影响的文件以用于还原。此操作将需要一些时间...
Applying patch 12311357...
ApplySession 将中间补丁程序 '12311357'应用到 OH '/u01/app/ora11g/product/11.2.0/grid'
正在备份受补丁程序 '12311357'影响的文件以用于回退。此操作将需要一些时间...
正在为组件 oracle.crs, 11.2.0.2.0打补丁...
将文件复制到 "/u01/app/ora11g/product/11.2.0/grid/bin/appagent.bin"
将文件复制到 "/u01/app/ora11g/product/11.2.0/grid/bin/appvipcfg"
将文件复制到 "/u01/app/ora11g/product/11.2.0/grid/bin/appvipcfg.pl"
check Patch 12419353(12311357)
[oracle@hotel01 OPatch]$ ./opatch lsinventory
Invoking OPatch 11.2.0.1.5
Oracle 中间补丁程序安装程序版本 11.2.0.1.5
版权所有 (c) 2010, Oracle Corporation。保留所有权利。
Oracle 主目录 : /u01/app/ora11g/product/11.2.0/grid
主产品清单: /u01/app/oraInventory
从 : /etc/oraInst.loc
OPatch 版本 : 11.2.0.1.5
OUI 版本 : 11.2.0.2.0
OUI 位置 : /u01/app/ora11g/product/11.2.0/grid/oui
日志文件位置 : /u01/app/ora11g/product/11.2.0/grid/cfgtoollogs/opatch/opatch2011-08-07_19-42-23下午.log
Patch history file: /u01/app/ora11g/product/11.2.0/grid/cfgtoollogs/opatch/opatch_history.txt
Lsinventory Output file location : /u01/app/ora11g/product/11.2.0/grid/cfgtoollogs/opatch/lsinv/lsinventory2011-08-07_19-42-23下午.txt
--------------------------------------------
已安装的顶级产品 (1):
Oracle Grid Infrastructure 11.2.0.2.0
此 Oracle 主目录中已安装 1 个产品。
中间补丁程序 (1) :
Patch 12419353 : applied on Sun Aug 07 19:41:15 CST 2011
Unique Patch ID: 13846303
Created on 17 Jul 2011, 08:05:53 hrs PST8PDT
Bugs fixed:
12419353, 10157506, 10178670, 10425672, 12311357, 9959110, 10272615
10314123, 10014392, 10089120, 10057296, 9864003, 11775080, 9916145
10044622, 12399977, 12421404, 12340700, 10056713, 10637741, 9939306
9902536, 10007185, 10376847, 10038791, 11741224, 11655840, 10048487
10322157, 10260251, 10052721, 10028235, 10027079, 10357258, 10045436
10231906, 10622973, 9891341, 10072474, 10036834, 10029900, 9974223
10016083, 9918485, 11781515, 10040647, 10069541, 10029119, 10233159
12332919, 9812956, 10036193, 10015210, 12340501, 10621175, 11877079
8906163, 10111010, 10115514, 10104377, 10057680, 10280665, 10078086
9944948, 10146768, 10052529, 10011084, 10012319, 10073075, 10233811
10299006, 10248739, 10236074, 10128191, 11071429, 10019726, 9975837
10253630, 9949676, 11936945, 10637483, 10157622, 11698552, 10385838
10053985, 10425674, 9812970, 11828633, 11899801, 10083789, 9876201
10073372, 9963327, 11077756, 10375649, 9336825, 11682409, 10062301
10018215, 10105195, 10419987, 10071992, 10634513, 9926027, 10103954
10028343, 11866171, 10065216, 9907089, 9897335, 10190153, 11744313
10175855, 10284828, 10028637, 10361177, 9979706, 10324594, 10015460
9971646, 11782423, 11654726, 9978765, 10398810, 11904778, 10397652
9915329, 10107380, 10110969, 10305361, 10331452, 10083009, 10631693
10008467, 10048027, 10040109, 9944978, 10033106, 9978195, 11840629
10042143, 10284693, 10638381, 9679401, 11663339, 10075643, 10205290
10124517, 11069614, 9593552, 10168006, 12677816, 11807012, 11846686
9867867, 10228079, 10015603, 10241696, 9942881, 10252497, 10283058
10157625, 10283167, 9906432, 10216878, 10045316, 10425675, 10061534
11789566, 10283549, 10311856, 10150020, 12421420, 12378675, 10113899
10069698, 9861790, 10087118, 10056808, 10146744, 10326548, 10019796
9975343, 9936659, 10244210, 10029794, 10266447, 10193581, 12318560
11804097, 10070563, 10268642, 10283596
--------------------------------------------
OPatch succeeded.
Patch 12419331(11724916)
[oracle@gc OPatch]$ ./opatch napply -oh /u01/app/ora11g/product/11.2.0/grid -local /112db/psu/gi/12419331
check Patch 12419331(11724916)
[oracle@hotel01 OPatch]$ ./opatch lsinventory
Invoking OPatch 11.2.0.1.5
Oracle 中间补丁程序安装程序版本 11.2.0.1.5
版权所有 (c) 2010, Oracle Corporation。保留所有权利。
Oracle 主目录 : /u01/app/ora11g/product/11.2.0/grid
主产品清单: /u01/app/oraInventory
从 : /etc/oraInst.loc
OPatch 版本 : 11.2.0.1.5
OUI 版本 : 11.2.0.2.0
OUI 位置 : /u01/app/ora11g/product/11.2.0/grid/oui
日志文件位置 : /u01/app/ora11g/product/11.2.0/grid/cfgtoollogs/opatch/opatch2011-08-07_20-04-17下午.log
Patch history file: /u01/app/ora11g/product/11.2.0/grid/cfgtoollogs/opatch/opatch_history.txt
Lsinventory Output file location : /u01/app/ora11g/product/11.2.0/grid/cfgtoollogs/opatch/lsinv/lsinventory2011-08-07_20-04-17下午.txt
--------------------------------------------
已安装的顶级产品 (1):
Oracle Grid Infrastructure 11.2.0.2.0
此 Oracle 主目录中已安装 1 个产品。
中间补丁程序 (2) :
Patch 12419331 : applied on Sun Aug 07 19:53:19 CST 2011
Unique Patch ID: 13846303
Created on 11 Jul 2011, 07:34:02 hrs PST8PDT
Bugs fixed:
10151017, 10158965, 11724916, 10190642, 12586486, 12586487, 10129643
12586488, 12586489, 10018789, 9744252, 10248523, 9956713, 10356513
9715581, 9770451, 10378005, 10170431, 10425676, 10222719, 10126094
9591812, 10127360, 10132870, 10094201, 9443361, 10193846, 11664046
11069199, 10324294, 10245086, 12586490, 10205230, 12586491, 10052141
12586492, 12586493, 12586494, 10142788, 11818335, 11830776, 12586495
9905049, 11830777, 12586496, 11830778, 6892311, 10040921, 10077191
10358019, 12431716, 10219576, 10258337, 11707699, 10264680, 10209232
11651810, 10102506, 11067567, 9881076, 10278372, 10040531, 10621169
10155605, 10082277, 10356782, 10218814, 9078442, 9788588, 10157249
9735237, 10317487, 12326246, 11707302, 10310299, 10636231, 10230571
11065646, 12419321, 10368698, 10079168, 10013431, 10228151, 10233732
10324526, 8223165, 10238786, 10217802, 10061015, 9953542, 9572787
10052956, 10080579, 11699057, 12620422, 10332111, 10227288, 10329146
10332589, 10110863, 10073683, 9869401, 10019218, 10229719, 11664719
9539440, 10373381, 9735282, 9748749, 11724984, 10022980, 10411618
11800854, 12419331, 11674485, 10187168, 6523037, 10648873, 9724970
10053725, 10084145, 10367188, 11800170, 11695285, 10157402, 9651350, 10299224
Patch 12419353 : applied on Sun Aug 07 19:41:15 CST 2011
Unique Patch ID: 13846303
Created on 17 Jul 2011, 08:05:53 hrs PST8PDT
Bugs fixed:
12419353, 10157506, 10178670, 10425672, 12311357, 9959110, 10272615
10314123, 10014392, 10089120, 10057296, 9864003, 11775080, 9916145
10044622, 12399977, 12421404, 12340700, 10056713, 10637741, 9939306
9902536, 10007185, 10376847, 10038791, 11741224, 11655840, 10048487
10322157, 10260251, 10052721, 10028235, 10027079, 10357258, 10045436
10231906, 10622973, 9891341, 10072474, 10036834, 10029900, 9974223
10016083, 9918485, 11781515, 10040647, 10069541, 10029119, 10233159
12332919, 9812956, 10036193, 10015210, 12340501, 10621175, 11877079
8906163, 10111010, 10115514, 10104377, 10057680, 10280665, 10078086
9944948, 10146768, 10052529, 10011084, 10012319, 10073075, 10233811
10299006, 10248739, 10236074, 10128191, 11071429, 10019726, 9975837
10253630, 9949676, 11936945, 10637483, 10157622, 11698552, 10385838
10053985, 10425674, 9812970, 11828633, 11899801, 10083789, 9876201
10073372, 9963327, 11077756, 10375649, 9336825, 11682409, 10062301
10018215, 10105195, 10419987, 10071992, 10634513, 9926027, 10103954
10028343, 11866171, 10065216, 9907089, 9897335, 10190153, 11744313
10175855, 10284828, 10028637, 10361177, 9979706, 10324594, 10015460
9971646, 11782423, 11654726, 9978765, 10398810, 11904778, 10397652
9915329, 10107380, 10110969, 10305361, 10331452, 10083009, 10631693
10008467, 10048027, 10040109, 9944978, 10033106, 9978195, 11840629
10042143, 10284693, 10638381, 9679401, 11663339, 10075643, 10205290
10124517, 11069614, 9593552, 10168006, 12677816, 11807012, 11846686
9867867, 10228079, 10015603, 10241696, 9942881, 10252497, 10283058
10157625, 10283167, 9906432, 10216878, 10045316, 10425675, 10061534
11789566, 10283549, 10311856, 10150020, 12421420, 12378675, 10113899
10069698, 9861790, 10087118, 10056808, 10146744, 10326548, 10019796
9975343, 9936659, 10244210, 10029794, 10266447, 10193581, 12318560
11804097, 10070563, 10268642, 10283596
--------------------------------------------
OPatch succeeded.
[oracle@hotel01 bin]$ ./crsctl start has
CRS-4123: Oracle High Availability Services已启动
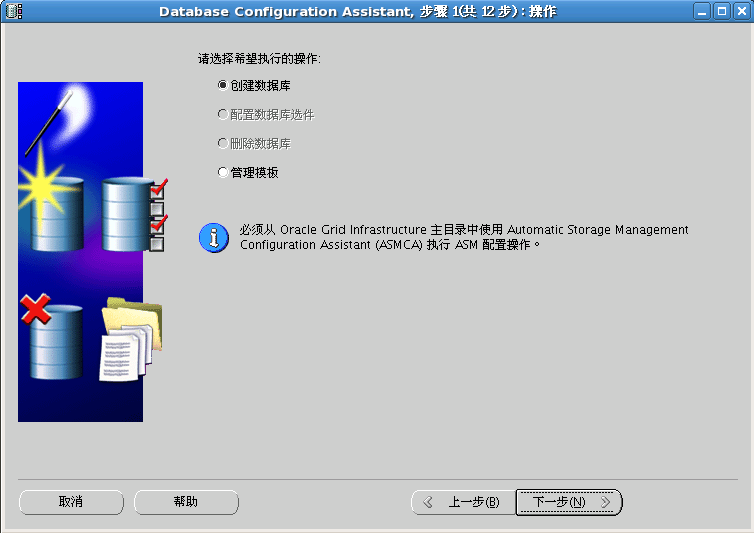
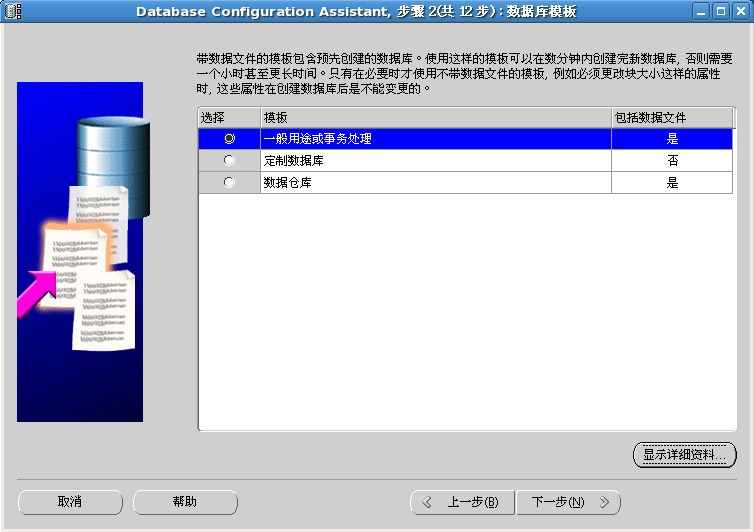
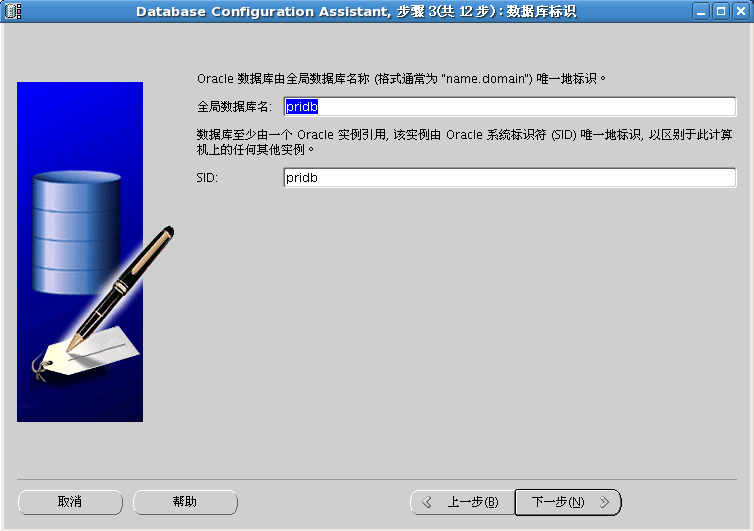
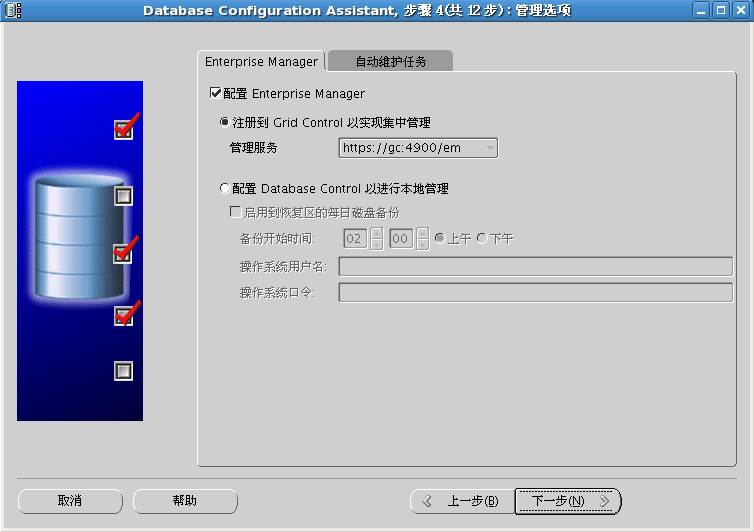
安装agent PSU按上GC agent PUS安装方法。创建数据库
先安装GIASM 那么监听会自动创建
然后再创建数据库不要单独创建监听
ASM
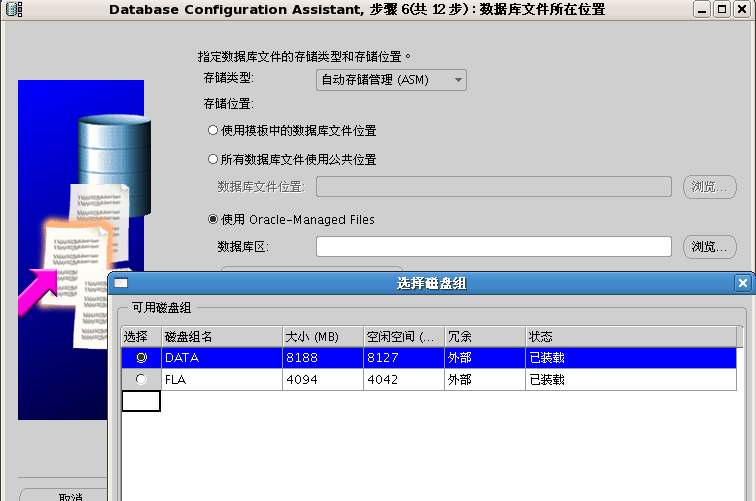
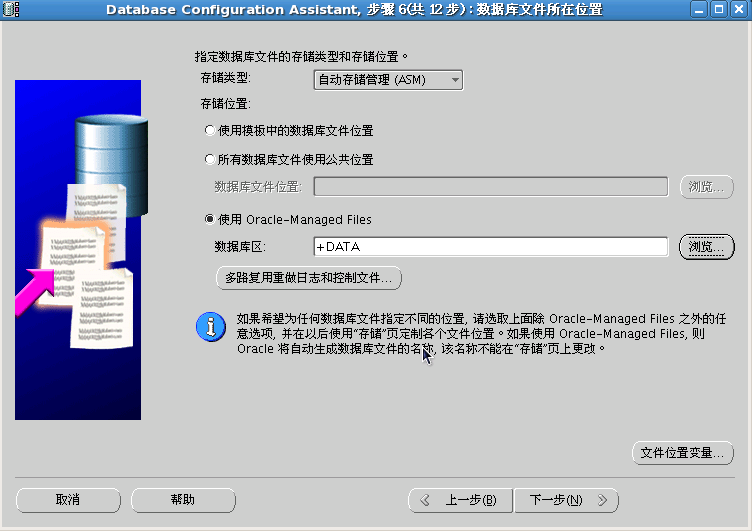
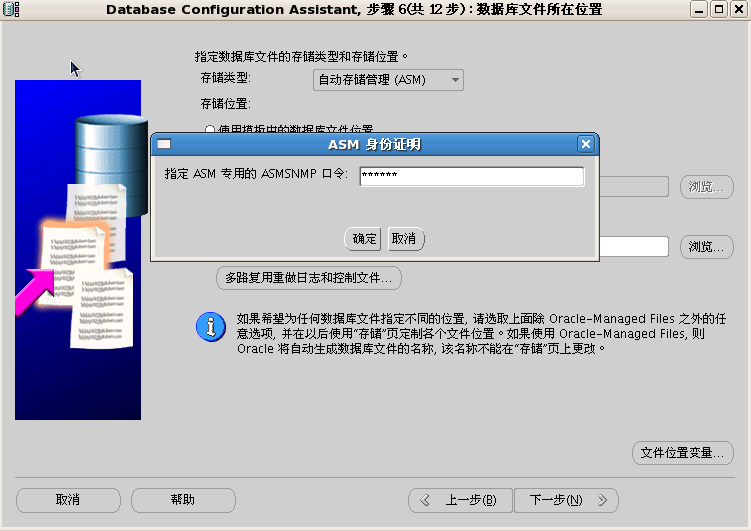
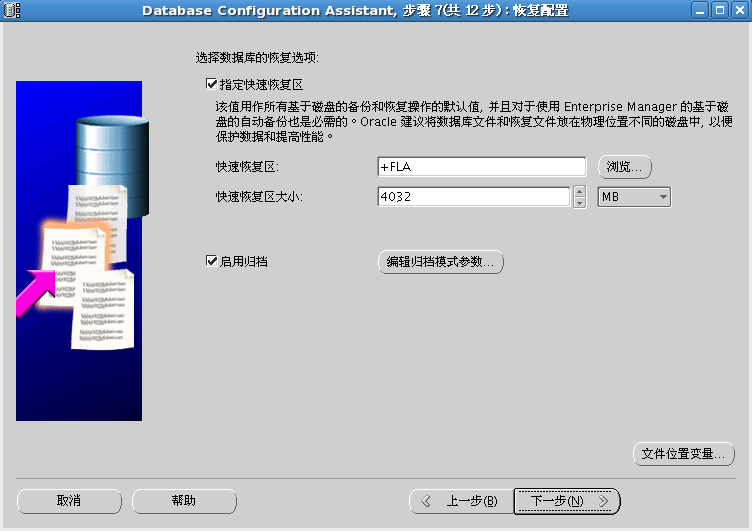
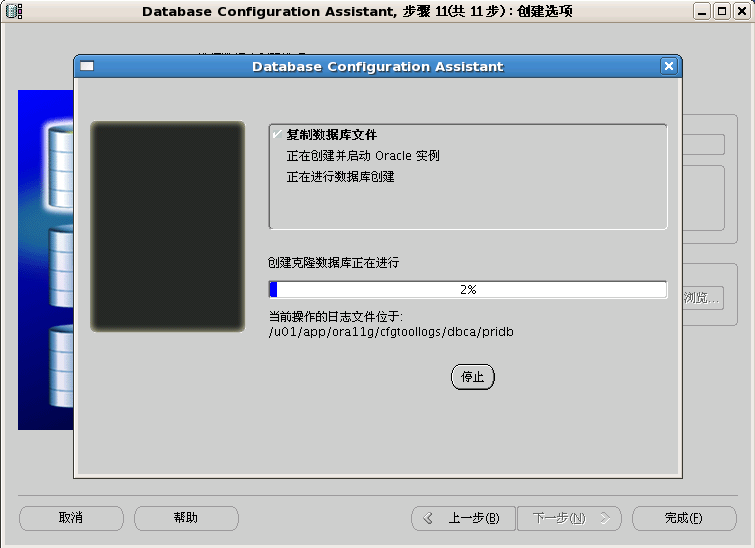
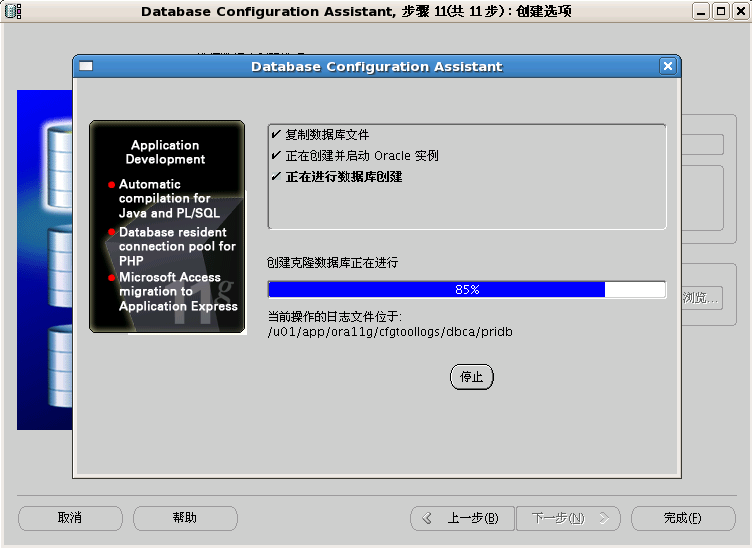
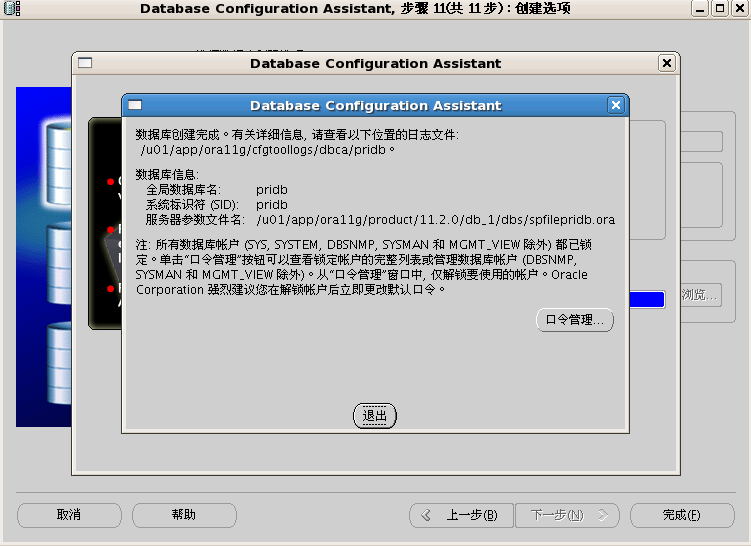
参考如下图:

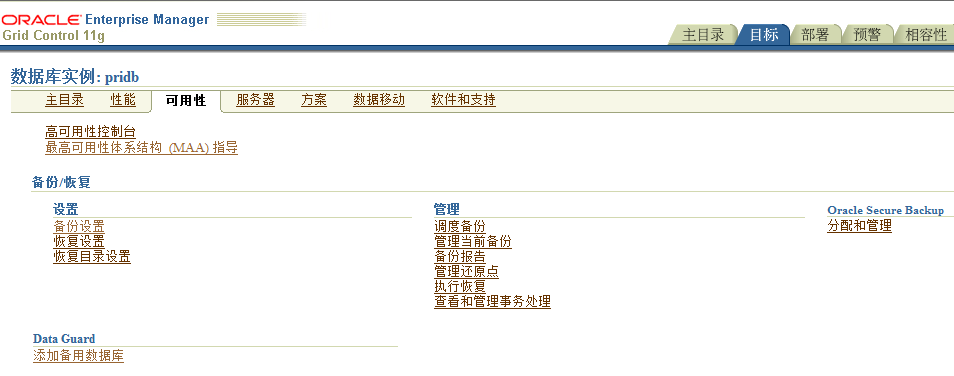
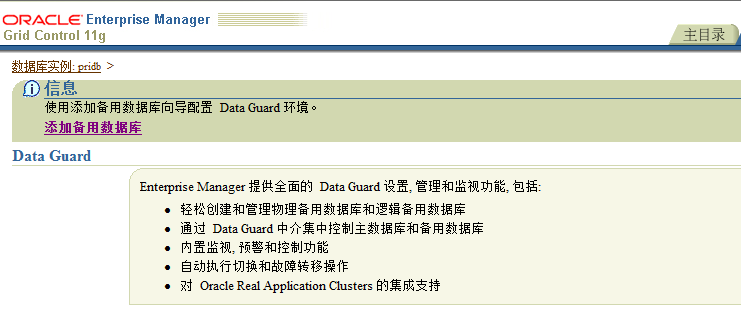
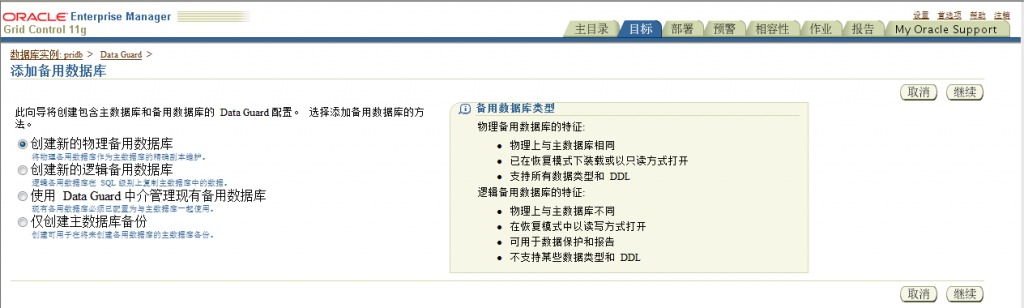
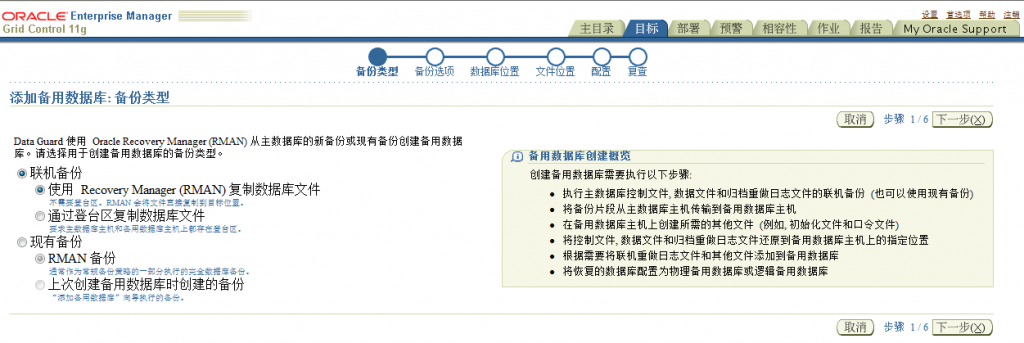
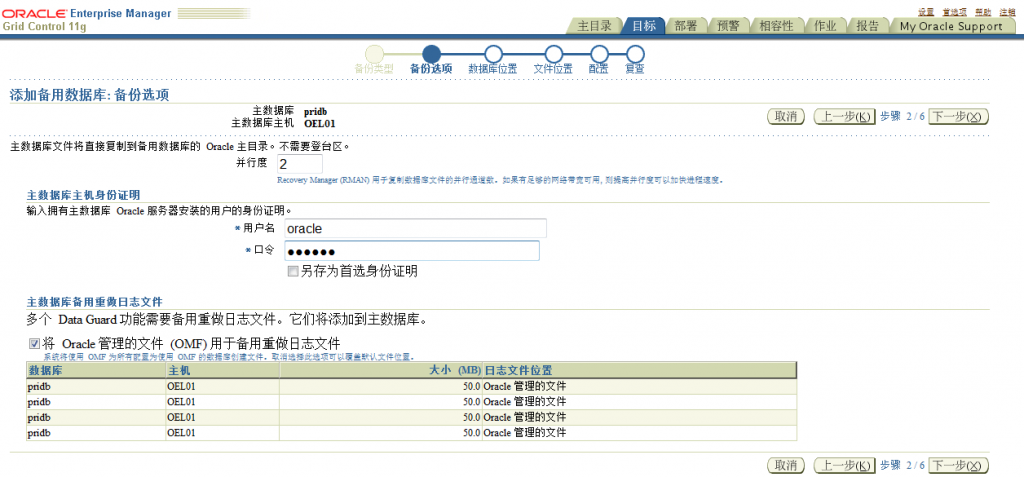
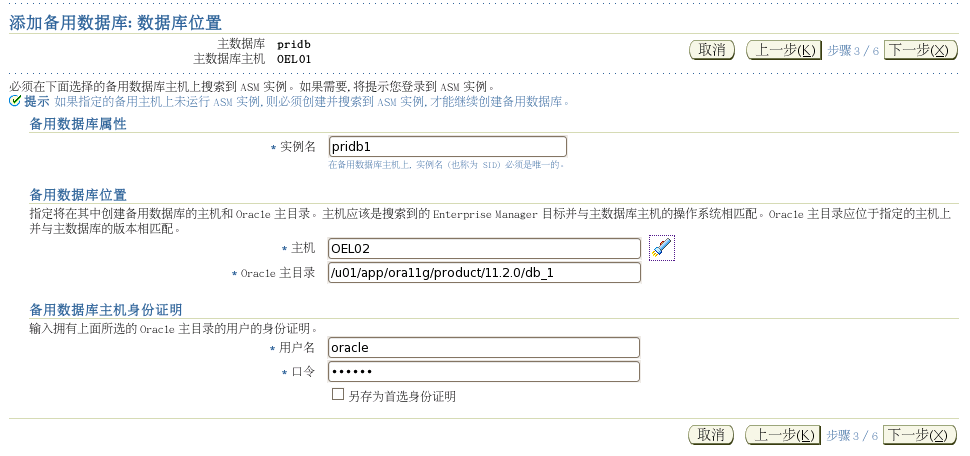
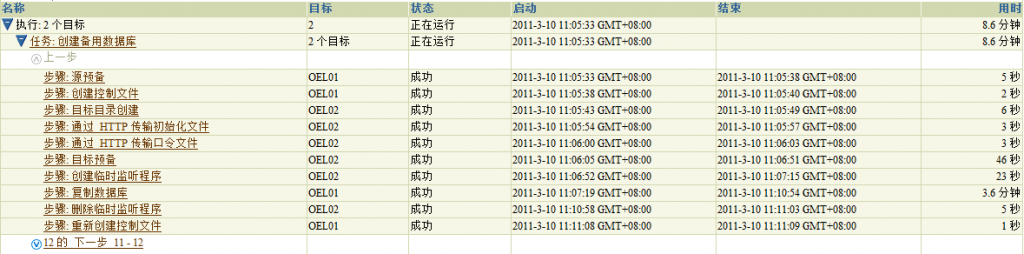
三.配置第一个DG
10.1.5.242
hotel02首先安装数据库软件不建库不创建监听,然后安装GI的时候会自动创建监听并启动,一定要用GIRD的监听,不然ASM注册不到监听。最后安装AGENT
1、 数据库软件,升级Opatch
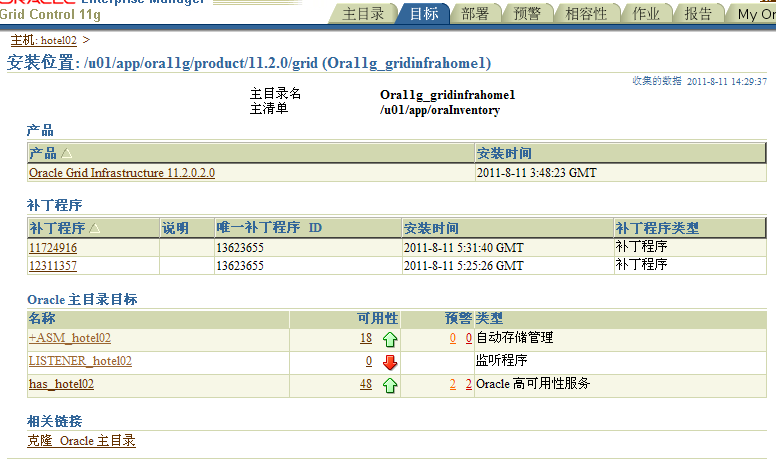
2、 GI
3、 Agent
4、打db,gi,agent各种补丁
打软件补丁(2419331)、GI补丁(12419353、12419331)、agent补丁(9345913)
注意:在安装主备库时,一定要按照上面的安装软件的顺序,否则可能会遇到在安装完db,gi后不能在grid control发现home安装目标,所以要先安装完种软件,最后打补丁。
Vi /etc/hosts
10.1.5.241 hotel01
10.1.5.242 hotel02
10.1.5.243 hotel03
10.1.5.245 gc.localdomain gc
~
[oracle@OEL02 ~]$ lsnrctl status
LSNRCTL for Linux: Version 11.2.0.2.0 - Production on 10-3月 -2011 10:28:57
Copyright (c) 1991, 2010, Oracle. All rights reserved.
正在连接到 (ADDRESS=(PROTOCOL=tcp)(HOST=)(PORT=1521))
LISTENER 的 STATUS
------------------------
别名 LISTENER
版本 TNSLSNR for Linux: Version 11.2.0.2.0 - Production
启动日期 09-3月 -2011 21:15:42
正常运行时间 0天 13小时 13分 14秒
跟踪级别 off
安全性 ON: Local OS Authentication
SNMP OFF
监听程序参数文件 /u01/app/ora11g/product/11.2.0/grid/network/admin/listener.ora
监听程序日志文件 /u01/app/ora11g/diag/tnslsnr/OEL02/listener/alert/log.xml
监听端点概要...
(DESCRIPTION=(ADDRESS=(PROTOCOL=ipc)(KEY=EXTPROC1521)))
(DESCRIPTION=(ADDRESS=(PROTOCOL=tcp)(HOST=OEL02)(PORT=1521)))
服务摘要..
服务 "+ASM" 包含 1 个实例。
实例 "+ASM", 状态 READY, 包含此服务的 1个处理程序...
命令执行成功
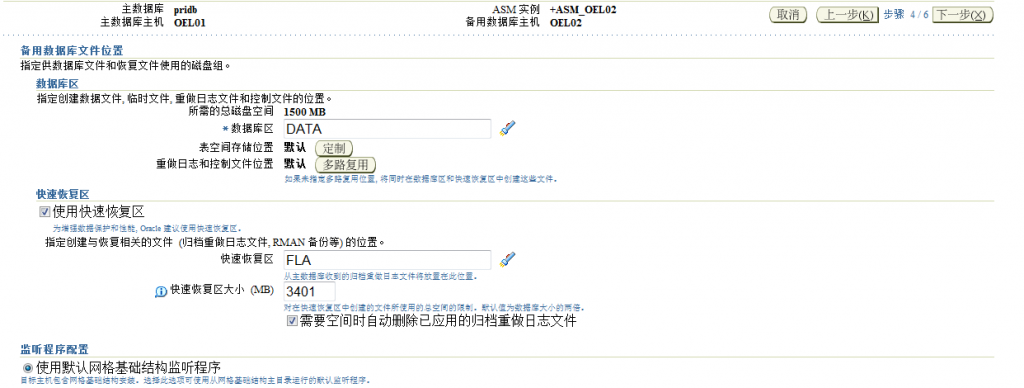
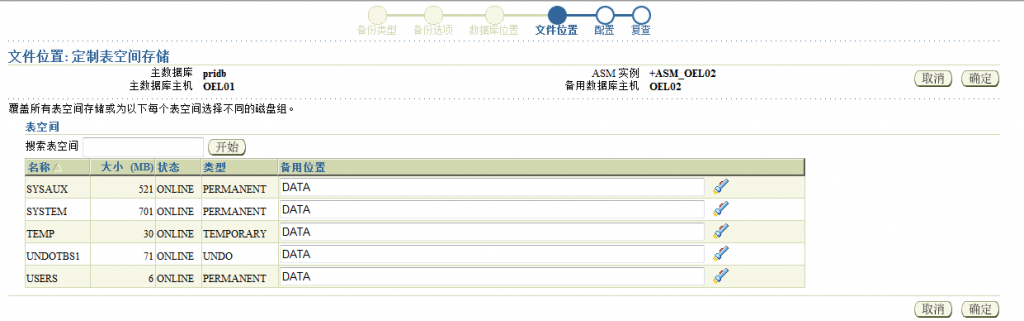
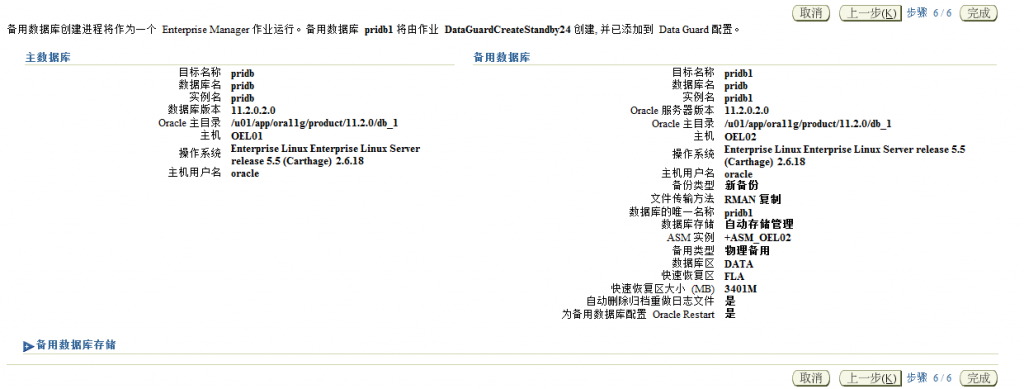
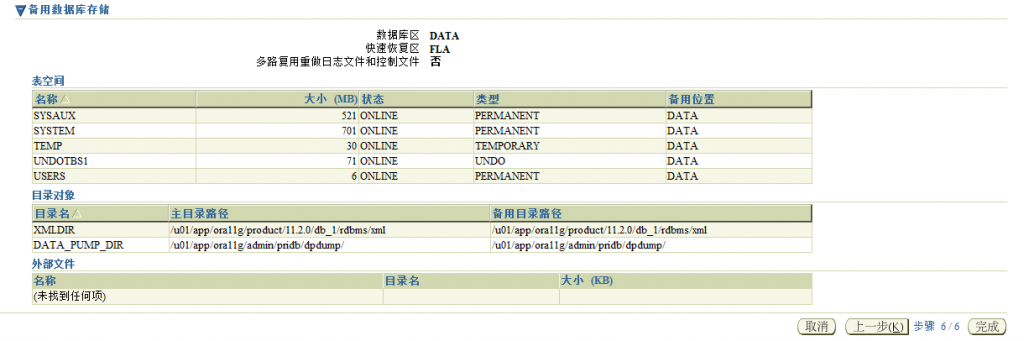
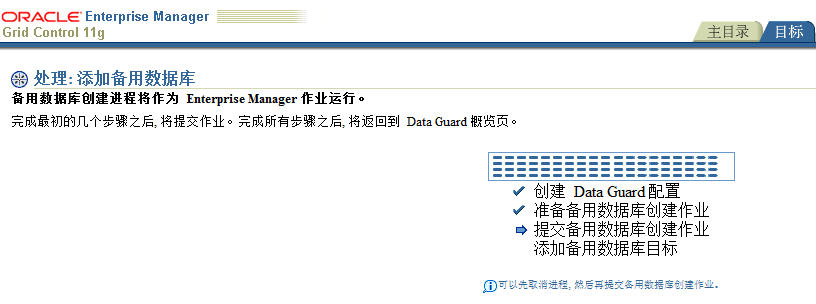
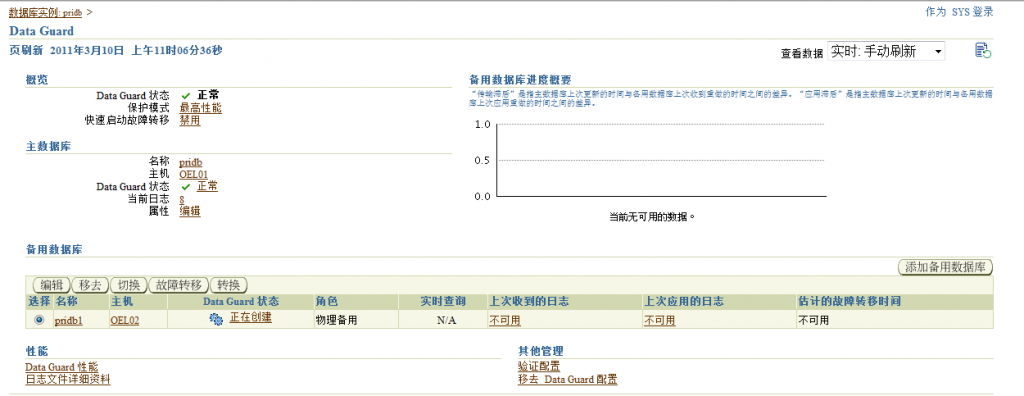
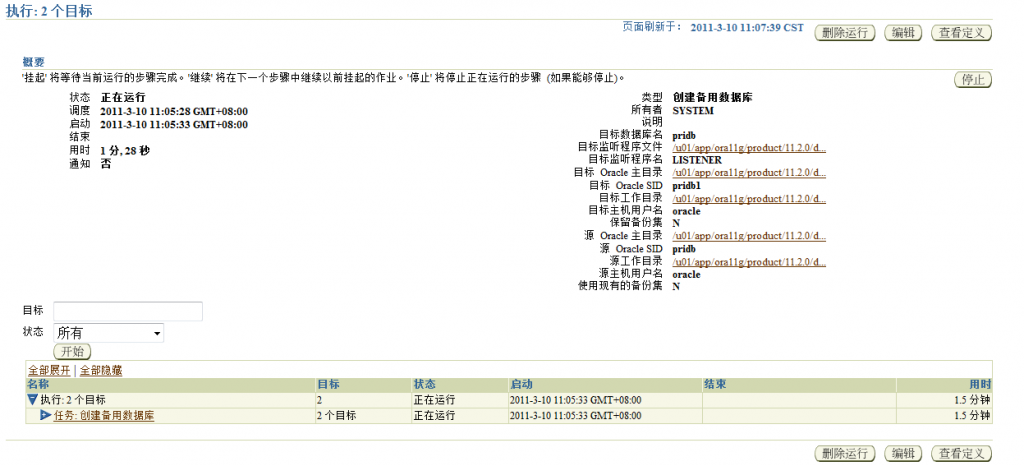
开始配置DG
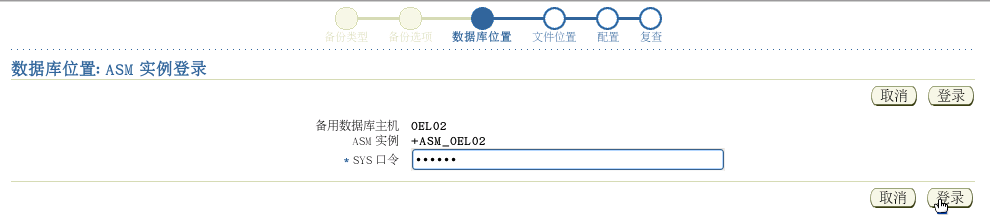


[root@hotel02 ~]# cat /etc/oratab
#Backup file is /u01/app/ora11g/product/11.2.0/db_1/srvm/admin/oratab.bak.oel02 line added by Agent
#
# This file is used by ORACLE utilities. It is created by root.sh
# and updated by the Database Configuration Assistant when creating
# a database.
# A colon, ':', is used as the field terminator. A new line terminates
# the entry. Lines beginning with a pound sign, '#', are comments.
#
# Entries are of the form:
# $ORACLE_SID:$ORACLE_HOME:<N|Y>:
#
# The first and second fields are the system identifier and home
# directory of the database respectively. The third filed indicates
# to the dbstart utility that the database should , "Y", or should not,
# "N", be brought up at system boot time.
#
# Multiple entries with the same $ORACLE_SID are not allowed.
#
#
+ASM:/u01/app/ora11g/product/11.2.0/grid:N
# *:/u01/app/agent11g:N
# *:/u01/app/agent11g:N
*:/u01/app/agent11g:N
pridb1:/u01/app/ora11g/product/11.2.0/db_1:N
pridb:/u01/app/ora11g/product/11.2.0/db_1:N # line added by Agent
[root@hotel02 ~]#
新添加第二个DG
10.1.5.243
OEL03首先安装数据库软件不建库不创建监听,然后安装GI的时候会自动创建监听并启动,一定要用GIRD的监听,不然ASM注册不到监听。最后安装AGENT
1、 数据库软件
2、 GI
3、 Agent
4、 安装db,gi,agent的各种补丁
Vi /etc/hosts
10.1.5.241 hotel01
10.1.5.242 hotel02
10.1.5.243 hotel03
10.1.5.245 gc.localdomain gc
[oracle@OEL03 ~]$ wget https://gc:4900/agent_download/11.1.0.1.0/linux_x64/agentDownload.linux_x64 --no-check-certificate
[oracle@OEL03 ~]$ chmod u+x agentDownload.linux_x64
./agentDownload.linux_x64 -b /u01/app/ -m gc -r 4900 y

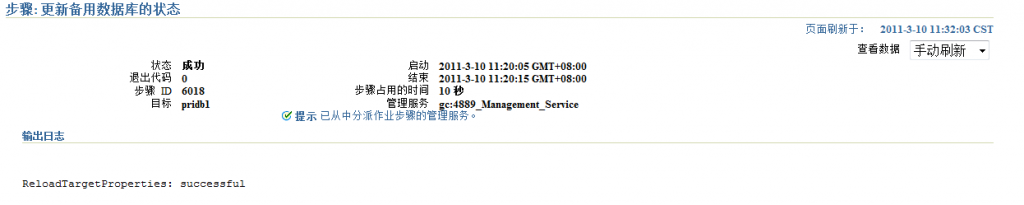
用GC添加DG的第二个节点
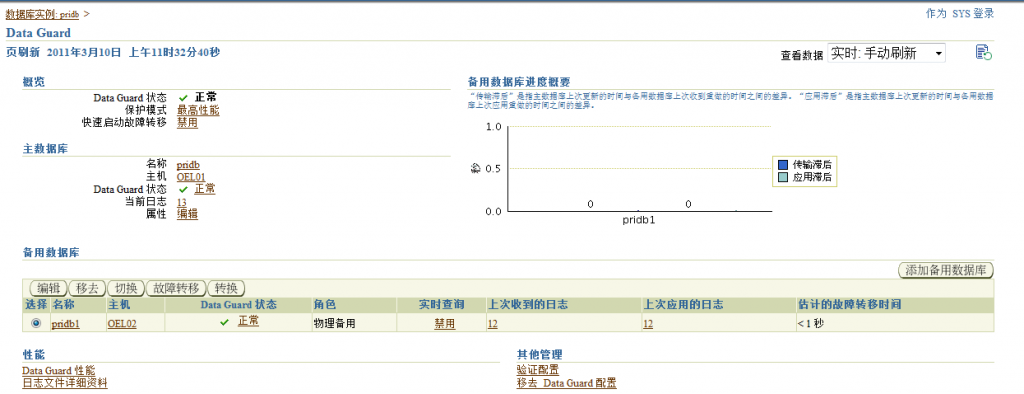
打开只读并且恢复

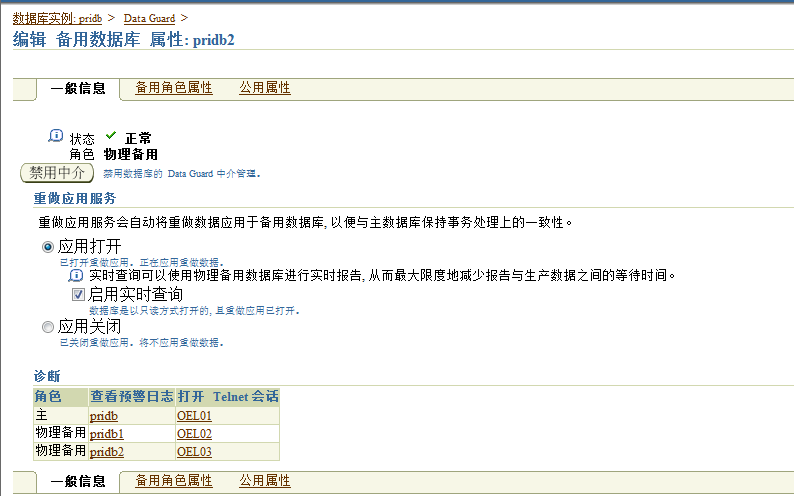
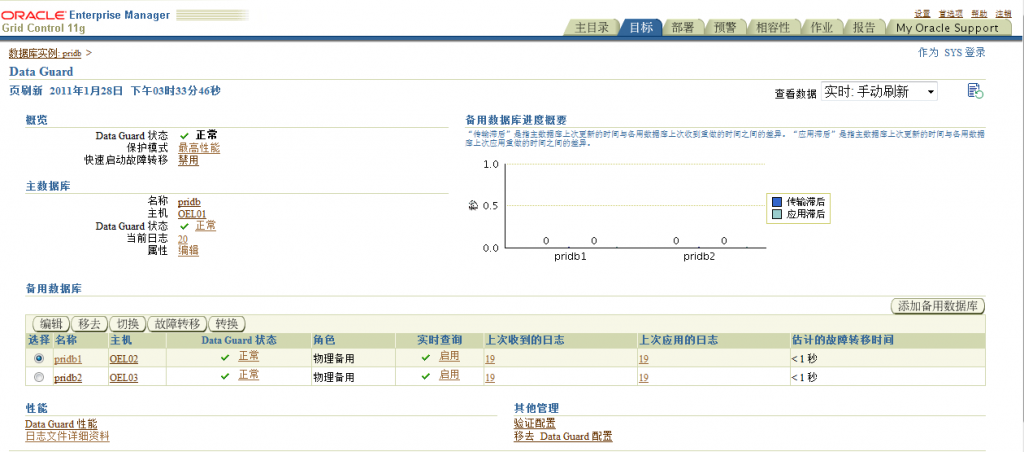
开始实时复制
备库状态
SQL> select status ,instance_name from v$instance;
STATUS INSTANCE_NAME
------------ ----------------
MOUNTED pridb1
SQL>
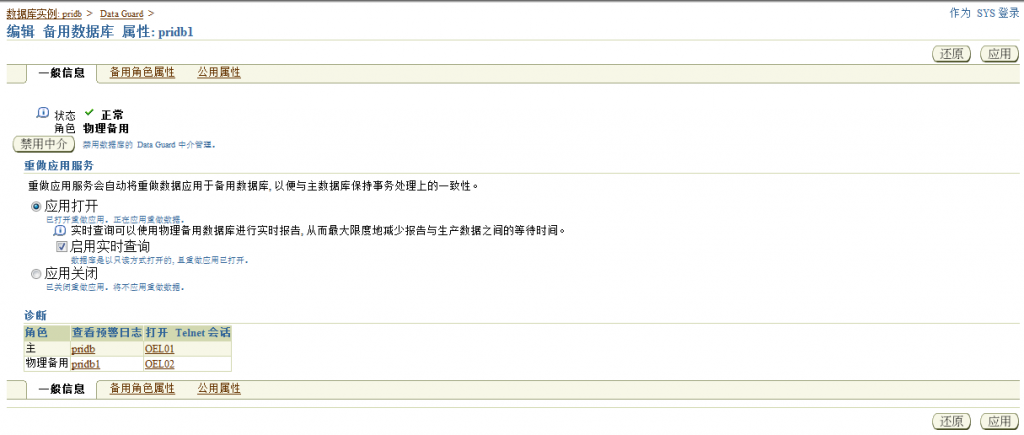

Open readonly 之后
SQL>select status ,instance_name from v$instance;
STATUS INSTANCE_NAME
------------ ----------------
OPEN pridb1
SQL> select open_mode from v$database;
OPEN_MODE
--------------------
READ ONLY WITH APPLY
sqlplus system/oracle
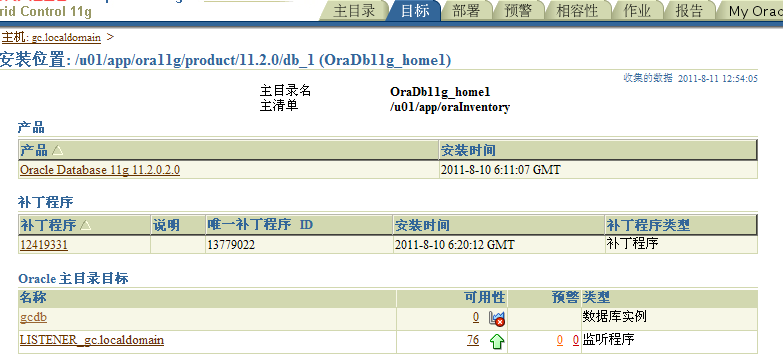
Pridb 主库
SQL> create table t1 as select * from dba_objects where rownum<1000;
表已创建。
SQL>
Pridb1 pridb2
SQL> select count(*) from t1;
COUNT(*)
----------
999
备注:安装包括主库和备库,都不需要用netca创建监听,安装GI的时候会自动创建监听并启动
目录/u01/app/ora11g/product/11.2.0/grid/network/admin/listener.ora
四.后期配置管理数据库备份策略
(1)在gc服务器配置recovery catalog管理各节点的数据库备份
建catalog用户及表空间
[oracle@gc sh]$ !sql
sqlplus "/as sysdba"
SQL> create tablespace rman_tbs datafile '/u01/app/ora11g/oradata/gcdb/rman_tbs01.dbf' size 200m;
SQL> create user rman identified by rman default tablespace rman_tbs;
用户已创建。
SQL> grant connect,resource,recovery_catalog_owner to rman;
授权成功。
SQL> exit
修改tnsnames.ora如下:
GCDB =
(DESCRIPTION =
(ADDRESS = (PROTOCOL = TCP)(HOST = gc.localdomain)(PORT = 1521))
(CONNECT_DATA =
(SERVER = DEDICATED)
(SERVICE_NAME = gcdb)
)
)
htdb1_241 =
(DESCRIPTION =
(ADDRESS = (PROTOCOL = TCP)(HOST = 10.1.5.241)(PORT = 1521))
(CONNECT_DATA =
(SERVER = DEDICATED)
(SERVICE_NAME = htdb1)
)
)
htdb2_242 =
(DESCRIPTION =
(ADDRESS = (PROTOCOL = TCP)(HOST = 10.1.5.242)(PORT = 1521))
(CONNECT_DATA =
(SERVER = DEDICATED)
(SERVICE_NAME = htdb2)
)
)
htdb3_243 =
(DESCRIPTION =
(ADDRESS = (PROTOCOL = TCP)(HOST = 10.1.5.243)(PORT = 1521))
(CONNECT_DATA =
(SERVER = DEDICATED)
(SERVICE_NAME = htdb3)
)
)
创建recovery catalog:
[oracle@gc admin]$ rman catalog rman/rman@gcdb
RMAN> create catalog;
恢复目录已创建
(2)注册目标主数据库:
[oracle@gc ~]$ rman catalog rman/rman@gcdb target sys/oracle123@htdb1_241
RMAN> register database;
注册在恢复目录中的数据库
正在启动全部恢复目录的 resync
完成全部 resync
RMAN> report schema;
RMAN>CONFIGURE RETENTION POLICY TO REDUNDANCY 2;
RMAN> CONFIGURE ARCHIVELOG DELETION POLICY TO APPLIED ON ALL STANDBY;
(3)配置RMAN的主备库DB_UNIQUE_NAM参数(此步可选)。
当使用下面的命令时所用到RESYNC CATALOG FROM DB_UNIQUE_NAME。配置方法如下:
CONFIGURE DB_UNIQUE_NAME BOSTON CONNECT IDENTIFIER 'boston_conn_str';
注意:主备库密码文件的sysdba密码必需相同,'boston_conn_str'是在主库配置备库的的tns连接服务别名。
RMAN> CONFIGURE DB_UNIQUE_NAME 'HTDB2' CONNECT IDENTIFIER 'htdb2_242';
RMAN> CONFIGURE DB_UNIQUE_NAME 'HTDB3' CONNECT IDENTIFIER 'htdb3_243';
RMAN> LIST DB_UNIQUE_NAME OF DATABASE;
数据库列表
数据库关键字 数据库名称 数据库 ID 数据库角色 Db_unique_name
------- ------- ----------------- --------------- ------------------
1 HTDB2 1139129460 PRIMARY HTDB1
1 HTDB2 1139129460 STANDBY HTDB3
1 HTDB2 1139129460 STANDBY HTDB2
RMAN> RESYNC CATALOG FROM DB_UNIQUE_NAME 'HTDB2';
从 DB_UNIQUE_NAME为 HTDB2的数据库进行重新同步
在执行完上面的resync语句后,主库的CONFIGURE就会同步到备。可以分别用show all查看主备库配置。
(4)创建数据库备份和归档删除脚本
主库备份脚本:
[oracle@gc sh]$ cat rmanback241.sh
#!/bin/bash
. /home/oracle/.bash_profile
rman catalog rman/rman@gcdb target sys/oracle123@htdb1_241 msglog /home/oracle/log/rmanbak241.log <<EOF
run {
allocate channel c1 type disk ;
allocate channel c2 type disk ;
allocate channel c3 type disk ;
allocate channel c4 type disk ;
backup as compressed BACKUPSET database include current controlfile;
backup as compressed BACKUPSET archivelog all not backed up delete all input;
delete noprompt obsolete device type disk;
release channel c1;
release channel c2;
release channel c3;
release channel c4;
}
exit
EOF
Exit
备库归档删除脚本:
[oracle@gc sh]$ cat delarchive_242.sh
. /home/oracle/.bash_profile
rman catalog rman/rman@gcdb target sys/oracle123@htdb2_242 msglog /home/oracle/log/delarchive242.log <<EOF
run {
delete noprompt archivelog all;
}
exit
EOF
Exit
创建作业执行:
[oracle@gc sh]$ crontab -l
0 1 * * * /home/oracle/sh/rmanbak241.sh
0 2 * * * /home/oracle/sh/delarchive_242.sh
0 2 * * * /home/oracle/sh/delarchive_243.sh
注意:如果在备库配置了下面的参数,备库会根据FRA的存储空间自动删除归档日志
CONFIGURE ARCHIVELOG DELETION POLICY TO APPLIED ON ALL STANDBY;
下面是alert日志删除归档的记录:
Sun Sep 04 20:24:47 2011
Deleted Oracle managed file +FRA/htdb3/archivelog/2011_08_23/thread_1_seq_74.285.759929211
Archived Log entry 188 added for thread 1 sequence 170 ID 0x31d23a74 dest 1:
Sun Sep 04 22:14:10 2011
Standby controlfile consistent with primary
RFS[3]: Selected log 6 for thread 1 sequence 172 dbid 835029032 branch 759004266
Sun Sep 04 22:14:10 2011
Media Recovery Waiting for thread 1 sequence 172 (in transit)
Recovery of Online Redo Log: Thread 1 Group 6 Seq 172 Reading mem 0
Mem# 0: +DATA/htdb3/onlinelog/group_6.279.759061067
Mem# 1: +FRA/htdb3/onlinelog/group_6.275.759061067
Sun Sep 04 22:14:11 2011
Deleted Oracle managed file +FRA/htdb3/archivelog/2011_08_23/thread_1_seq_75.284.759929221
Archived Log entry 189 added for thread 1 sequence 171 ID 0x31d23a74 dest 1:
Mon Sep 05 01:16:38 2011
Standby controlfile consistent with primary
RFS[3]: Selected log 7 for thread 1 sequence 173 dbid 835029032 branch 759004266
Mon Sep 05 01:16:38 2011
Media Recovery Waiting for thread 1 sequence 173 (in transit)
Recovery of Online Redo Log: Thread 1 Group 7 Seq 173 Reading mem 0
Mem# 0: +DATA/htdb3/onlinelog/group_7.280.759061069
Mem# 1: +FRA/htdb3/onlinelog/group_7.276.759061069
打开闪回功能
主库:
SQL> startup mount
ORACLE例程已经启动。
Total System Global Area 2438529024 bytes
Fixed Size 2228920 bytes
Variable Size 1375735112 bytes
Database Buffers 1040187392 bytes
Redo Buffers 20377600 bytes
数据库装载完毕。
SQL> alter database flashback on;
SQL> alter database open;
SQL> select flashback_on from v$database;
FLASHBACK_ON
------------------
YES
备库:
SQL> shutdown immediate
SQL> startup mount
SQL> alter database flashback on;
alter database flashback on
第 1行出现错误:
ORA-01153:激活了不兼容的介质恢复
SQL> alter database recover managed standby database cancel;
SQL> alter database flashback on;
SQL> alter database open;
五.安装过程中的问题
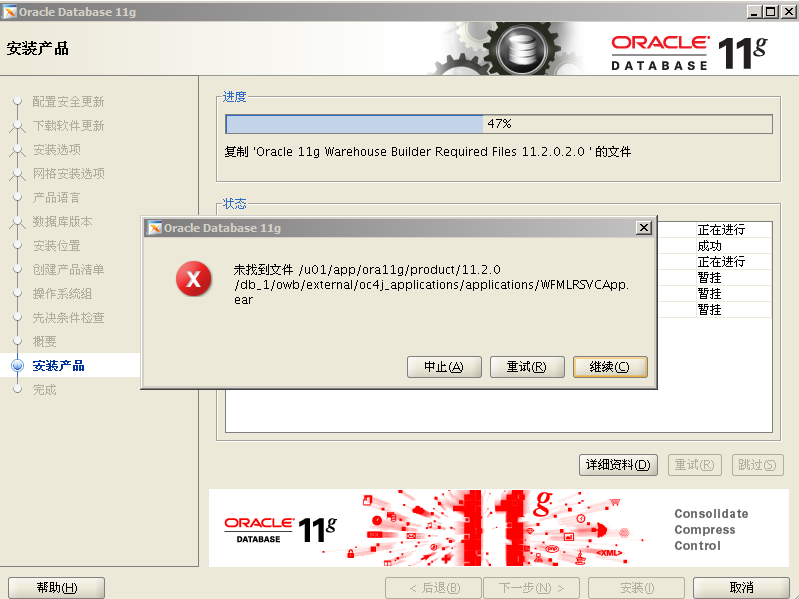
问题1:未找到文件W FMLRSVCApp.ear
1.数据库安装包的第二个包没有解压缩:10098816_112020_Linux-x86-64_2of7.zip,出现下面的错误:
问题2:ORACLE_MIDDLEWARE_HOME_LOCATION子目录已经存在
在安装grid control时,可能会由于在安装过程中异常中断,比如网络中断、机器突然重启、磁盘空间不够的情况。都会导致gc安装失败。
再次安装时会出现下面的问题:
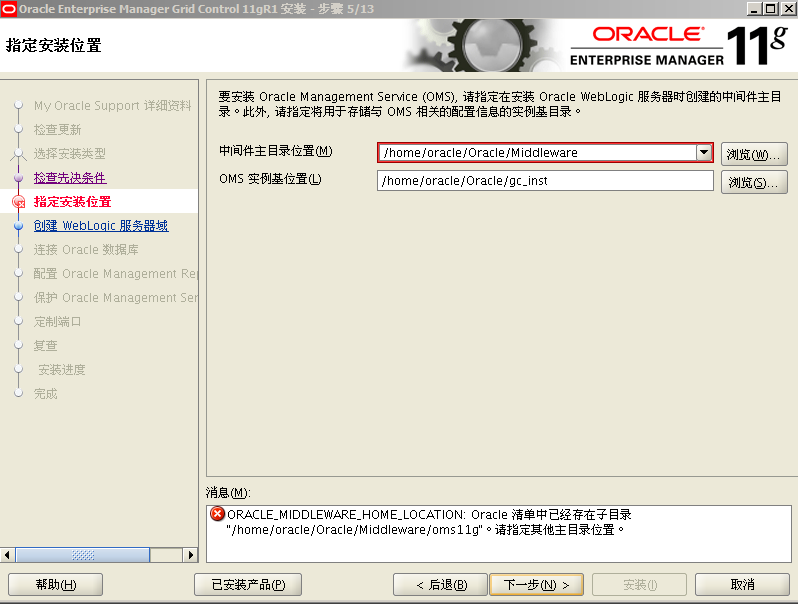
解决办法:
这时就需要把安装grid control先卸载,下面就是卸载gc的方法:
try this:
/etc/oratab
and also you have to remove following four entries from each of directories that stores inventory information:
Locate your central inventory directory from /etc/oraInst.loc
inventory_loc=/u00/app/oraInventory
ls -l
backup
ContentsXML
cd ContentsXML
vi inventory.xml
delete all the entries for
#<HOME NAME="oms11g1" LOC="/u00/app/oracle/product/11.2.0/Middleware/oms11g" TYPE="O" IDX="3"/>
#<HOME NAME="agent11g1" LOC="/u00/app/oracle/product/11.2.0/Middleware/agent11g" TYPE="O" IDX="4"/>
#<HOME NAME="common11g1" LOC="/u00/app/oracle/product/11.2.0/Middleware/oracle_common" TYPE="O" IDX="5"/>
#<HOME NAME="webtier11g1" LOC="/u00/app/oracle/product/11.2.0/Middleware/Oracle_WT" TYPE="O" IDX="6"/>
Also note that under directory Backups, there are further directories and you need to remove these entries from each and every inventory.xml.
cd backup
grep -i inventory */*/in*
once you remove all the entries.
Go to your location where you have installed Middleware.
in my case
cd /u00/app/oracle/product/11.2.0/Middleware.
rm -rf oms11g agent11g oracle_common Oracle_WT.
注意:如果在执行完上面的操作后,再返回安装界面后点击下一步仍然出现上面的问题,这时可能需要正在安装的界面关掉,然后再重新启动安装界面,在到这步一时就可过去。
问题3:patch 12423703 后续操作报错
在打完patch 12423703后,执行下面的后续操作时报错。
[oracle@gc 12423703]$ $ORACLE_HOME/bin/rcuJDBCEngine sysman/oracle123@gc.ums.com:1521:gcdb JDBC_SCRIPT apply.sql $PWD $ORACLE_HOME
…..
>>>A SQL Error occurred!: java.sql.SQLException: ORA-20110: Unexpected error executing MGMT_SET_JOB_Q_PROC. Check if patch of Bug#12620174 has been applied. Error:ORA-06576:不是有效的函数或过程名.Refer to My Oracle Support note 1326515.1 for additional information.
ORA-06512:在 line 480
oracle.sysman.assistants.common.dbutil.SQLFatalErrorException: java.sql.SQLException: ORA-20110: Unexpected error executing MGMT_SET_JOB_Q_PROC. Check if patch of Bug#12620174 has been applied. Error:ORA-06576:不是有效的函数或过程名. Refer to My Oracle Support note 1326515.1 for additional information.
ORA-06512:在 line 480
at oracle.sysman.assistants.common.dbutil.jdbc.JDBCEngine.onException(JDBCEngine.java:673)
at oracle.sysman.assistants.common.dbutil.jdbc.JDBCEngine.executeSql(JDBCEngine.java:637)
at oracle.sysman.assistants.common.dbutil.jdbc.JDBCEngine.executeSql(JDBCEngine.java:581)
at oracle.sysman.assistants.common.dbutil.jdbc.OracleDMLStatement.execute(ANSISQLStatementType.java:769)
at oracle.sysman.assistants.common.dbutil.jdbc.JDBCEngine.executeNextSQLStatement(JDBCEngine.java:1193)
at oracle.sysman.assistants.common.dbutil.jdbc.JDBCEngine.parseNexecuteScript(JDBCEngine.java:1097)
at oracle.sysman.assistants.common.dbutil.jdbc.JDBCEngine.main(JDBCEngine.java:1992)
Caused by: java.sql.SQLException: ORA-20110: Unexpected error executing MGMT_SET_JOB_Q_PROC. Check if patch of Bug#12620174 has been applied. Error:ORA-06576:不是有效的函数或过程名. Refer to My Oracle Support note 1326515.1 for additional information.
ORA-06512:在 line 480
at oracle.jdbc.driver.SQLStateMapping.newSQLException(SQLStateMapping.java:70)
at oracle.jdbc.driver.DatabaseError.newSQLException(DatabaseError.java:133)
at oracle.jdbc.driver.DatabaseError.throwSqlException(DatabaseError.java:206)
at oracle.jdbc.driver.T4CTTIoer.processError(T4CTTIoer.java:455)
at oracle.jdbc.driver.T4CTTIoer.processError(T4CTTIoer.java:413)
at oracle.jdbc.driver.T4C8Oall.receive(T4C8Oall.java:1035)
at oracle.jdbc.driver.T4CPreparedStatement.doOall8(T4CPreparedStatement.java:194)
at oracle.jdbc.driver.T4CPreparedStatement.executeForRows(T4CPreparedStatement.java:953)
at oracle.jdbc.driver.OracleStatement.doExecuteWithTimeout(OracleStatement.java:1223)
at oracle.jdbc.driver.OraclePreparedStatement.executeInternal(OraclePreparedStatement.java:3386)
at oracle.jdbc.driver.OraclePreparedStatement.execute(OraclePreparedStatement.java:3487)
at oracle.jdbc.driver.OraclePreparedStatementWrapper.execute(OraclePreparedStatementWrapper.java:1374)
at oracle.sysman.assistants.common.dbutil.jdbc.JDBCEngine.runSqlStatement(JDBCEngine.java:853)
at oracle.sysman.assistants.common.dbutil.jdbc.JDBCEngine.callRunSqlStatement(JDBCEngine.java:587)
at oracle.sysman.assistants.common.dbutil.jdbc.JDBCEngine.executeSql(JDBCEngine.java:602)
... 5 more
解决办法:安装Patch 12620174
参考matalink的文档1326515.1
修改时间 14-JUL-2011 类型 BULLETIN 状态 PUBLISHED
In this Document
Purpose
Scope and Application
Troubleshooting the Improved Patching Solution for Grid Control 11.1GC Management Server
Wrong SYSMAN Password
SYSMAN account is locked
Non-SYSMAN account is used
Invalid objects in SYSMAN schema
Parameter job_queue_processes is set to 0
DBMS Jobs are still running
PrerequisitePatch 12620174 is missing
FAQ
References
Applies to:
Enterprise Manager Grid Control - Version: 11.1.0.1 to 11.1.0.1 - Release: 11.1 to 11.1
Enterprise Manager Grid Control - Version: 11.1.0.1 to 11.1.0.1 [Release: 11.1 to 11.1]
Information in this document applies to any platform.
Purpose
Grid Control patches for the Oracle Management Server containing SQL changes are gradually delivered in a new fashion to address security, ease of use and troubleshooting concerns.
This document explains the different errors and their resolution, and contains as well a FAQ section.
OMS-sidePatch 12620174 is a prerequisite for this solution. Please refer to Note 1330489.1 for more details about it.
Scope and Application
The audience for this document is Grid Control administrators.
Troubleshooting the Improved Patching Solution for Grid Control 11.1GC Management ServerWrong SYSMAN Password
In case the wrong SYSMAN password is entered, the output is pretty much self-explanatory:
$ORACLE_HOME/bin/rcuJDBCEngine sysman@host:port:sid JDBC_SCRIPT apply.sql $PWD $ORACLE_HOMEPlease enter database password:A SQL Error occurred!Invalid username/password.Please enter valid username/password
Remedy: Enter the appropriate SYSMAN password at the prompt. If necessary, contact your DBA to get it reset.
SYSMAN account is locked
In case the SYSMAN account is locked, the output is pretty much self-explanatory:
$ORACLE_HOME/bin/rcuJDBCEngine sysman@host:port:sid JDBC_SCRIPT apply.sql $PWD $ORACLE_HOMEPlease enter database password:A SQL Error occurred!ORA-28000: the account is locked
Remedy: Contact your DBA to unlock the SYSMAN account
Non-SYSMAN account is used
In case one mistakenly uses a non-SYSMAN account to apply the patch, the output is:
$ORACLE_HOME/bin/rcuJDBCEngine sysman@host:port:sid JDBC_SCRIPT apply.sql $PWD $ORACLE_HOMEPlease enter database password: ###### SQL Patching operation has started. The Pre-requisites check ############ may take upto 3 minutes. Please do not cancel the operation. ############ Refer to My Oracle Support note 1326515.1 for more information ########### Start Patch Pre-requisites Check ######Error encountered. Cleaning up in prereq-check exception block###### Patch Pre-requisites check FAILED. Exiting Patching process. ######>>>A SQL Error occurred!java.sql.SQLException: ORA-20101: Current User is SYS, not SYSMAN. Retry the same command connecting as SYSMAN user. Refer to My Oracle Support note 1326515.1 for additional information.ORA-06512: at line 480
Remedy: Use the appropriate account (generally SYSMAN) as described in the patch README.txt
Invalid objects in SYSMAN schema
In case there are invalid objects in SYSMAN schema while applying the patch, the output is:
$ORACLE_HOME/bin/rcuJDBCEngine sysman@host:port:sid JDBC_SCRIPT apply.sql $PWD $ORACLE_HOMEPlease enter database password: ###### SQL Patching operation has started. The Pre-requisites check ############ may take upto 3 minutes. Please do not cancel the operation. ############ Refer to My Oracle Support note 1326515.1 for more information ########### Start Patch Pre-requisites Check ######job_queue_processes value before patching---------------- ---------------SID Job Queue value---------------- ---------------repos 10 --------------------------------Value of job_queue_processes is set to 0###### Patch Pre-requisites Check SUCCESSFUL ############ Execution of the SQL files in the patch was SUCCESSFUL ############ Start Patch Post Validation ######job_queue_processes value after patching---------------- ---------------SID Job Queue value---------------- ---------------repos 10 --------------------------------Invalid Objects count is: 1----------------------------------##### Patch Post Validation SUCCESSFUL ############ SQL Patching operation SUCCESSFUL ######------------------------- INFORMATION --------------------------------Use the following Query to know the invalid objects in SYSMAN schema:SELECT object_name, object_type, subobject_nameFROM all_objects WHEREstatus != 'VALID'AND owner = 'SYSMAN'ORDER BY 1, 2, 3;Refer to My Oracle Support note 1326515.1 for additional information.---------------------------------Completed SQL script execution normally.<n> scripts were processed
Remedy: Work with your DBA to recompile invalid objects from the SYSMAN schema
Parameter job_queue_processes is set to 0The database parameter job_queue_processes is temporarily set to 0 during the SQL patching operation. However, this parameter should generally be set to 10 for Grid Control to work properly. This is why the patching utility displays a warning in case the job_queue_processes parameter is set to 0 prior to starting the patching operation, as shown in the snippet below:
--------------------------- INFORMATION ---------------------------Value of job_queue_processes is 0. Please set it to a positivevalue for normal functioning of Enterprise Manager. Use one of the below commands as applicable: - Set the value of job_queue_processes to N on ALL instances:- "exec sys.mgmt_set_job_q_proc(<N>);" - Set the value of job_queue_processes to N on instance 'SID':- "exec sys.mgmt_set_job_q_proc(<N>, '<SID>');" Refer to My Oracle Support note 1326515.1 for additional information.--------------------------------
Remedy: Ask your DBA to set the job_queue_processes parameter to an appropriate value
DBMS Jobs are still runningThe Grid Control product relies on a couple of DBMS jobs to operate normally. These jobs needs to be stopped prior to starting the patching operation. The patching utility initially checks if such jobs are running and if some are running, it would wait for 3 minutes for them to complete before starting the patching exercise.
This is why we see the following snippet at the beginning of the patching operation:
###### SQL Patching operation has started. The Pre-requisites check ############ may take upto 3 minutes. Please do not cancel the operation. ############ Refer to My Oracle Support note 1326515.1 for more information ######
In case one or multiple DBMS jobs are still running after 3 minutes, the patching utility fails and displays the following output:
$ORACLE_HOME/bin/rcuJDBCEngine sysman@host:port:sid JDBC_SCRIPT apply.sql $PWD $ORACLE_HOMEPlease enter database password: ###### SQL Patching operation has started. The Pre-requisites check ############ may take upto 3 minutes. Please do not cancel the operation. ############ Refer to My Oracle Support note 1326515.1 for more information ########### Start Patch Pre-requisites Check ######job_queue_processes value before patching---------------- ---------------SID Job Queue value---------------- ---------------repos 10 --------------------------------Value of job_queue_processes is set to 0Error encountered. Cleaning up in prereq-check exception blockReverting back to the original value of job_queue_processesjob_queue_process values after restoring due to errors in prereq-check---------------- ---------------SID Job Queue value---------------- ---------------repos 10 --------------------------------###### Patch Pre-requisites check FAILED. Exiting Patching process. ######>>>A SQL Error occurred!java.sql.SQLException: ORA-20106: Exiting the script since some DBMS jobs are still running in the Repository. Please re-run the script after this query returns zero rows. SELECT l.id2 job, l.sid, to_char(last_date, 'DD-MON-YYYY:HH24.MI.SS') last_date, to_char(this_date, 'DD-MON-YYYY:HH24.MI.SS') this_date, l.inst_id instance FROM sys.job$ j, gv$lock l WHERE l.type = 'JQ' AND j.job (+) = l.id2 ORDER BY 5, 4;. Refer to My Oracle Support note 1326515.1 for additional information.ORA-06512: at line 480
Remedy: Follow the instructions given in the error message to check when all DBMS jobs are stopped, then re-run the patching operation. If needed, contact your DBA to figure out why these jobs are still running.
PrerequisitePatch 12620174 is missingThis is the case where one attempts to apply a patch built with the new patching solution but forgot to install the prerequisitePatch 12620174.
- If the sysman password is not provided on the command line, this operation fails with:
$ORACLE_HOME/bin/rcuJDBCEngine sysman@host:port:sid JDBC_SCRIPT apply.sql $PWD $ORACLE_HOME
Exception in thread "main" java.lang.StringIndexOutOfBoundsException: String index out of range: 0at java.lang.String.charAt(String.java:686)at oracle.net.resolver.AddrResolution.resolveAndExecute(AddrResolution.java:386)at oracle.net.ns.NSProtocol.establishConnection(NSProtocol.java:634)at oracle.net.ns.NSProtocol.connect(NSProtocol.java:208)at oracle.jdbc.driver.T4CConnection.connect(T4CConnection.java:966)at oracle.jdbc.driver.T4CConnection.logon(T4CConnection.java:292)at oracle.jdbc.driver.PhysicalConnection.<init>(PhysicalConnection.java:508)at oracle.jdbc.driver.T4CConnection.<init>(T4CConnection.java:203)at oracle.jdbc.driver.T4CDriverExtension.getConnection(T4CDriverExtension.java:33)at oracle.jdbc.driver.OracleDriver.connect(OracleDriver.java:510)at java.sql.DriverManager.getConnection(DriverManager.java:582)at java.sql.DriverManager.getConnection(DriverManager.java:154)at oracle.sysman.assistants.common.dbutil.jdbc.ConnectionFactory.createConnection(ConnectionFactory.java:259)at oracle.sysman.assistants.common.dbutil.jdbc.ConnectionFactory.createConnection(ConnectionFactory.java:142)at oracle.sysman.assistants.common.dbutil.jdbc.ConnectionHelper.getConnection(ConnectionHelper.java:61)at oracle.sysman.assistants.common.dbutil.jdbc.JDBCEngine.getConnection(JDBCEngine.java:889)at oracle.sysman.assistants.common.dbutil.jdbc.JDBCEngine.connect(JDBCEngine.java:417)at oracle.sysman.assistants.common.dbutil.jdbc.JDBCEngine.main(JDBCEngine.java:1982)- If the SYSMAN password is provided on the command line, this operation fails with:
$ORACLE_HOME/bin/rcuJDBCEngine sysman/password@host:port:sid JDBC_SCRIPT apply.sql $PWD $ORACLE_HOME
[some more lines...]oracle.sysman.assistants.common.dbutil.SQLFatalErrorException: java.sql.SQLException: ORA-20110: ORA-20110: Unexpected error executing MGMT_SET_JOB_Q_PROC. Check if patch of Bug#12620174 has been applied. Error:ORA-06576: not a valid function or procedure name Refer to My Oracle Support note 1326515.1 for additional informationORA-06512: at line 471at oracle.sysman.assistants.common.dbutil.jdbc.JDBCEngine.onException(JDBCEngine.java:673)at oracle.sysman.assistants.common.dbutil.jdbc.JDBCEngine.executeSql(JDBCEngine.java:637)at oracle.sysman.assistants.common.dbutil.jdbc.JDBCEngine.executeSql(JDBCEngine.java:581)at oracle.sysman.assistants.common.dbutil.jdbc.OracleDMLStatement.execute(ANSISQLStatementType.java:769)at oracle.sysman.assistants.common.dbutil.jdbc.JDBCEngine.executeNextSQLStatement(JDBCEngine.java:1193)at oracle.sysman.assistants.common.dbutil.jdbc.JDBCEngine.parseNexecuteScript(JDBCEngine.java:1097)at oracle.sysman.assistants.common.dbutil.jdbc.JDBCEngine.main(JDBCEngine.java:1992)Caused by: java.sql.SQLException: ORA-20110: ORA-20110: Unexpected error executing MGMT_SET_JOB_Q_PROC. Check if patch of Bug#12620174 has been applied. Error:ORA-06576: not a valid function or procedure name Refer to My Oracle Support note 1326515.1 for additional informationORA-06512: at line 471at oracle.jdbc.driver.SQLStateMapping.newSQLException(SQLStateMapping.java:70)at oracle.jdbc.driver.DatabaseError.newSQLException(DatabaseError.java:133)at oracle.jdbc.driver.DatabaseError.throwSqlException(DatabaseError.java:206)at oracle.jdbc.driver.T4CTTIoer.processError(T4CTTIoer.java:455)at oracle.jdbc.driver.T4CTTIoer.processError(T4CTTIoer.java:413)at oracle.jdbc.driver.T4C8Oall.receive(T4C8Oall.java:1035)at oracle.jdbc.driver.T4CPreparedStatement.doOall8(T4CPreparedStatement.java:194)at oracle.jdbc.driver.T4CPreparedStatement.executeForRows(T4CPreparedStatement.java:953)at oracle.jdbc.driver.OracleStatement.doExecuteWithTimeout(OracleStatement.java:1223)at oracle.jdbc.driver.OraclePreparedStatement.executeInternal(OraclePreparedStatement.java:3386)at oracle.jdbc.driver.OraclePreparedStatement.execute(OraclePreparedStatement.java:3487)at oracle.jdbc.driver.OraclePreparedStatementWrapper.execute(OraclePreparedStatementWrapper.java:1374)at oracle.sysman.assistants.common.dbutil.jdbc.JDBCEngine.runSqlStatement(JDBCEngine.java:853)at oracle.sysman.assistants.common.dbutil.jdbc.JDBCEngine.callRunSqlStatement(JDBCEngine.java:587)at oracle.sysman.assistants.common.dbutil.jdbc.JDBCEngine.executeSql(JDBCEngine.java:602)Remedy: Install the prerequisitePatch 12620174 on the OMS side and re-run the patching operation
FAQQ1: Is the legacy SQL patching method still applicable ?
A1: Yes, but only for the legacy patches delivered prior to the new patching solution.
Q2: How to know for sure which rcuJDBCEngine exact syntax to use ?
A2: Always refer to the README shipped with the patch to figure out which exact syntax to use.
Q3: What if I apply legacy patches with the new solution ?
A3: If the patch README is fully followed, this is not a problem.
Q4: What if I apply a new patch and prerequisite Patch 12620174 is missing ?
A4: The patch application will fail. The output on the screen will be pretty much verbose but it will mention that the prerequisite patch is missing. See the above section "PrerequisitePatch 12620174 is missing" for details.问题4:agent状态不正确
安装完agent后,agent状态不正确。
[oracle@hotel02 bin]$ ./emctl status agent
Oracle Enterprise Manager 11g Release 1 Grid Control 11.1.0.1.0
Copyright (c) 1996, 2010 Oracle Corporation. All rights reserved.
---------------------------
Agent Version : 11.1.0.1.0
OMS Version : 11.1.0.1.0
Protocol Version : 11.1.0.0.0
Agent Home : /u01/app/agent11g
Agent binaries : /u01/app/agent11g
Agent Process ID : 10956
Parent Process ID : 10928
Agent URL : https://hotel02:3872/emd/main/
Repository URL : https://gc.ums.com:4900/em/upload
Started at : 2011-08-07 22:39:49
Started by user : oracle
Last Reload : 2011-08-07 22:43:16
Last successful upload : (none)
Last attempted upload : (none)
Total Megabytes of XML files uploaded so far : 0.00
Number of XML files pending upload : 34
Size of XML files pending upload(MB) : 2.21
Available disk space on upload filesystem : 17.80%
Last attempted heartbeat to OMS : 2011-08-07 22:48:49
Last successful heartbeat to OMS : unknown
---------------------------
Agent is Running and Ready
[oracle@hotel01 bin]$ ./emctl upload agent
Oracle Enterprise Manager 11g Release 1 Grid Control 11.1.0.1.0
Copyright (c) 1996, 2010 Oracle Corporation. All rights reserved.
---------------------------
EMD upload error: uploadXMLFiles skipped :: OMS version not checked yet. If this issue persists check trace files for ping to OMS related errors.
解决办法:
(1)修改/etc/hosts内容和格式
修改/etc/hosts为:
[oracle@hotel01 bin]$ cat /etc/hosts
# Do not remove the following line, or various programs
# that require network functionality will fail.
127.0.0.1 hotel01 localhost.localdomain localhost
::1 localhost6.localdomain6 localhost6
10.1.5.241 hotel01
10.1.5.242 hotel02
10.1.5.243 hotel03
10.1.5.245 gc.ums.com gc
[oracle@hotel01 bin]$ pwd
/u01/app/agent11g/bin
[oracle@hotel01 bin]$ ./emctl upload agent
Oracle Enterprise Manager 11g Release 1 Grid Control 11.1.0.1.0
Copyright (c) 1996, 2010 Oracle Corporation. All rights reserved.
---------------------------
EMD upload error: Upload timed out before completion.
Number of files to upload before the upload: 60, total size (MB): 1.06.
Remaining number of files to upload: 60, total size (MB): 1.06.
[oracle@hotel01 bin]$ ./emctl upload agent
Oracle Enterprise Manager 11g Release 1 Grid Control 11.1.0.1.0
Copyright (c) 1996, 2010 Oracle Corporation. All rights reserved.
---------------------------
EMD upload completed successfully
[oracle@hotel01 bin]$ ./emctl status agent
Oracle Enterprise Manager 11g Release 1 Grid Control 11.1.0.1.0
Copyright (c) 1996, 2010 Oracle Corporation. All rights reserved.
---------------------------
Agent Version : 11.1.0.1.0
OMS Version : 11.1.0.1.0
Protocol Version : 11.1.0.0.0
Agent Home : /u01/app/agent11g
Agent binaries : /u01/app/agent11g
Agent Process ID : 22024
Parent Process ID : 21997
Agent URL : https://hotel01:1830/emd/main/
Repository URL : https://gc.ums.com:4900/em/upload
Started at : 2011-08-07 23:30:39
Started by user : oracle
Last Reload : 2011-08-07 23:32:36
Last successful upload : 2011-08-08 00:28:02
Total Megabytes of XML files uploaded so far : 3.18
Number of XML files pending upload : 0
Size of XML files pending upload(MB) : 0.00
Available disk space on upload filesystem : 20.12%
Last successful heartbeat to OMS : 2011-08-08 00:28:25
---------------------------
Agent is Running and Ready
(2)This issue is addressed in an unpublished Bug 9464955
下面是gc_agnet 11.1.0.1.0版本<AGENT_HOME>/sysman/log/emagent.trc日志的报错内容:
2012-02-09 15:32:31,114 Thread-1085823296 ERROR pingManager: Did not receive valid response to ping "ERROR-Agent is blocked. Blocked reason is: Agent is out-of-sync with repository. This most likely means that the agent was reinstalled or recovered. Please contact an EM administrator to unblock the agent by performing an agent resync from the console. Please contact EM adminstrator to unblock the agent"
11.1 Agent Upload is Failing With "ERROR-Agent is blocked. Blocked reason is: Agent is out-of-sync with repository" [ID 1362430.1]
修改时间 27-SEP-2011 类型 PROBLEM 状态 REVIEWED
In this Document
Symptoms
Cause
Solution
ReferencesApplies to:
Enterprise Manager Grid Control - Version: 11.1.0.1 and later [Release: 11.1 and later ]
Information in this document applies to any platform.Symptoms
11.1 Agent failing to upload with the below error:
D:\Oracle\agent11g\BIN>emctl upload agentOracle Enterprise Manager 11g Release 1 Grid Control 11.1.0.1.0Copyright (c) 1996, 2010 Oracle Corporation. All rights reserved.---------------------------EMD upload error: uploadXMLFiles skipped :: OMS version not checked yet. If this issue persists check trace files for ping to OMS related errors.2011-09-27 11:09:13,387 Thread-3800 ERROR pingManager: Did not receive valid response to ping "ERROR-Agent is blocked. Blocked reason is: Agent is out-of-sync with repository. This most likely means that the agent was reinstalled or recovered. Please contact an EM administrator to unblock the agent by performing an agent resync from the console. Please contact EM adminstrator to unblock the agent""Upload metric data" button is greyed out.oracle.sysman.emSDK.emd.comm.CommException: IOException in reading Response :: Connection reset
Loged into console >> setup >> patching setup >> gave the agent url under " Test URL" and clicked on test >> working fine.
From OMS box Able to ping the Agent box without any problem2011-09-27 13:17:42,866 [EMUI_13_17_40_/console/admin/rep/emdConfig/emdTargetsMain$target=OIMPRDDALL01A.ahmsi.local_3A3872$type=oracle*_emd] ERROR emdConfig.EmdConfigTargetsData getEmdTargetsList.2043 - IOException in reading Response :: Connection resetoracle.sysman.emSDK.emd.comm.CommException: IOException in reading Response :: Connection resetat oracle.sysman.emSDK.emd.comm.EMDClient.parseResponseStream(EMDClient.java:2861)at oracle.sysman.emSDK.emd.comm.EMDClient.getResponseForRequest_(EMDClient.java:2578)at oracle.sysman.emSDK.emd.comm.EMDClient.getResponseForRequest_(EMDClient.java:2511)at oracle.sysman.emSDK.emd.comm.EMDClient.getResponseForRequest(EMDClient.java:2456)at oracle.sysman.emSDK.emd.comm.EMDClient.getResponseForRequest(EMDClient.java:2405)at oracle.sysman.emSDK.emd.comm.EMDClient.getMetadataTypes(EMDClient.java:658)Cause
This issue is addressed in an unpublishedBug 9464955 : CANNOT UNBLOCK AN AGENT FROM THE UI: COMMEXCEPTION - CONNECTION RESET
Solution
1. Stop the agent:
<AGENT_HOME>/BIN> emctl stop agent
2. Secure the agent which will generate a new key:<AGENT_HOME>/BIN> emctl secure agent
3. Start the agent:<AGENT_HOME>/BIN> emctl start agent
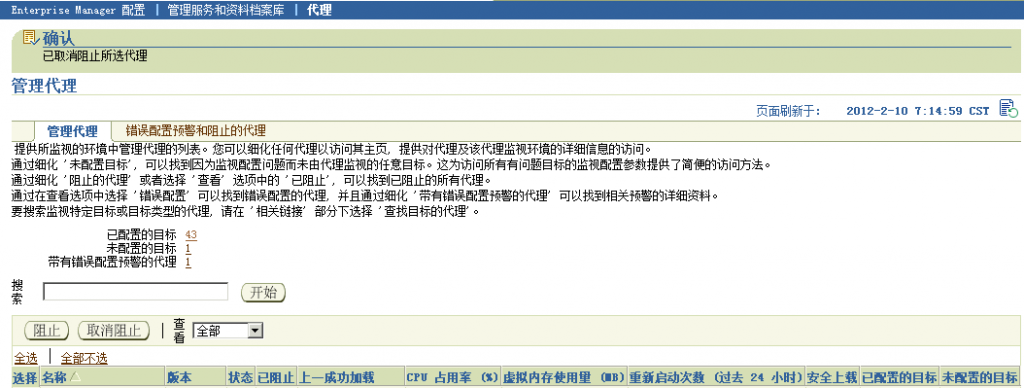
4. Login to the grid console >> Setup >> Agents >> Navigate to the problematic agent home page >> Click on Agent resynchronization点击右上角的“设置”

点击右上角的“代理”

点击不可用的代理连接


(3)The repository URL is incorrect
下面是matalink解决办法:
11g Agent Upload Fails with "OMS version not checked Yet". [ID 1265052.1]
修改时间 10-APR-2011 类型 PROBLEM 状态 REVIEWED
In this Document
Symptoms
Cause
SolutionApplies to:
Enterprise Manager Grid Control - Version: 10.2.0.1 and later [Release: 10.2 and later ]
Information in this document applies to any platform.Symptoms
10.2.0.x or 11.1.0.1 Agent fails to upload to OMS with following error message:
EMD upload error: uploadXMLFiles skipped :: OMS version not checked yet. If this issue persists check trace files for ping to OMS related errors.Cause
The repository URL is incorrect.
The REPOSITORY_URL and the EMD_URL for the agent should use the same protocol. HTTP or HTTPS.
In this case, the REPOSITORY_URL and EMD_URL can be seen from the AGENT_HOME/sysman/config/emd.properties or in the AGENT_HOME/bin: emctl status agent:From <AGENT_HOME>/sysman/config/emd.properties:
EMD_URL=http://agent.machine.com:3872/emd/mainREPOSITORY_URL=https://oms.machine.com:4900/em/upload$<AGENT_HOME>/bin/emctl status agent:
Oracle Enterprise Manager 11g Release 1 Grid Control 11.1.0.1.0Copyright (c) 1996, 2010 Oracle Corporation. All rights reserved.---------------------------Agent Version : 11.1.0.1.0OMS Version : 11.1.0.1.0Protocol Version : 11.1.0.0.0Agent Home : /oracle/product/em/agent11gAgent binaries : /oracle/product/em/agent11gAgent Process ID : 811074Parent Process ID : 983100Agent URL : http://agent.machine.com:3872/emd/main/Repository URL : https://oms.machine.com:7799/em/upload/Started at : 2010-11-08 13:21:43Started by user : oracleLast Reload : 2010-11-08 13:21:43Last successful upload : (none)Last attempted upload : (none)Total Megabytes of XML files uploaded so far : 0.00Number of XML files pending upload : 68Size of XML files pending upload(MB) : 33.09Available disk space on upload filesystem : 16.71%Last attempted heartbeat to OMS : 2010-11-08 13:37:20Last successful heartbeat to OMS : unknown---------------------------Agent is Running and Ready
NOTE: The REPOSITORY_URL is HTTPS and the EMD_URL is HTTP.Both should be HTTPS if the agent was secured successfully.
Solution
1. Stop the agent:
$<AGENT_HOME>/bin/emctl stop agent
2. Backup and Update the AGENT_HOME/sysman/config/emd.properties file.
Change REPOSITORY_URL to:https://oms.machine.com:4889/em/uploadtohttp://oms.machine.com:4889/em/uploadNOTE: The protocol was changed from HTTPS to HTTP and the port was changed from the secure port to the unsecure upload port.
3. Re-secure and start the agent:$cd <AGENT_HOME/bin$./emctl secure agent$./emctl start agent$./emctl upload agent$./emctl status agentP.S: For Windows platform , "./" can be replaced with ".\"
(4)The OMS is locked in secure mode
下面是10.1.0.2 to 10.2.0.5版本此问题的解决方法:
Agent Upload to OMS Fails if the OMS is Locked in Secure Mode and Agent is not Secured
In this Document
Symptoms
Changes
Cause
Solution
ReferencesApplies to:
Enterprise Manager Base Platform - Version: 10.1.0.2 to 10.2.0.5 - Release: 10.1 to 10.2
Information in this document applies to any platform.
***Checked for relevance on 05-Oct-2011***Symptoms
Agent upload to OMS is failing. The 'emctl upload' command returns:
EMD upload error: uploadXMLFiles skipped :: OMS version not checked yet..
OR
EMD upload error: Failed to upload file A*.xml: HTTP error.
The <AGENT_HOME>/sysman/log/emagent.trc shows:2010-04-29 11:44:54,190 Thread-118266800 ERROR pingManager: nmepm_pingReposURL: Cannot connect to http://omsmachine.domain:4889/em/upload/: retStatus=-1
2010-04-29 11:44:54,195 Thread-121416624 WARN http: nmehl_connect_internal: connect failed to (omsmachine.domain:4889): Connection refused (error = 111)2010-04-29 11:44:54,195 Thread-121416624 ERROR upload: FxferSend: Cannot connect to: http://omsmachine.domain:4889/em/upload/. retStatus=-1
The Agent is trying to access ' http://omsmachine.domain:4889/em/upload/' URL and gets a 'Connection refused' error.
The <OMS_HOME>/sysman/log/emoms.trc file can show errors such as:OMSHandshake processFailure.806 - OMSHandshake failed.(AGENT URL =http://agentmachine.domain:3872/emd/main/)(ERROR = X-ORCL-EMAK MISSING)
In the 10.2.0.5 OMS versions, there is no error in the emoms.trc file. But the <OMS_HOME>/Apache/Apache/log/access_log shows:20.20.20.20 - [29/Apr/2010:13:49:31 +0530] "GET /em/upload/?ACTION=FIRST_HEARTBEAT&EMD_URL=http%3a%2f%2fagentmachine%2edomain%3a3872%2femd%2fmain%2f&HEARTBEAT_TIME=2010-04-29+13%3a52%3a09&OUTSTANDING_SEVS=TRUE&EMD_UPTIME=2010-04-29+13%3a42%3a32&OLDEST_COLL_TIME=2010-04-29+13%3a52%3a09&INSTALL_TYPE=agent&AGENT_TZ=Asia%2fCalcutta&BOUNCE_CTR=12&X-ORCL-EMOV=4%2e0%2e0&X-ORCL-EMCV=10%2e2%2e0%2e5%2e0&X-ORCL-EMSV=10%2e2%2e0%2e5%2e0 HTTP/1.1"403 346
The error code '403' indicates that the access to the '/em/upload' is forbidden.
Trying to access the OMS unsecure upload url: http://omsmachine.domain:4889/em/upload
from a browser also returns:Forbidden
You don't have permission to access /em/upload on this server.
--------------------------------------------
Oracle-Application-Server-10g/10.1.2.2.0 Oracle-HTTP-Server Server at omsmachine.domain Port 4889Changes
OMS has been recently locked for secure upload mode.
Cause
The OMS is locked in secure mode, hence is accepting uploads only from Agents which are secured with the OMS and sending the uploads to the https upload URL.
If any Agent tries to upload to the http URL, the connection will be rejected.
Solution
1. Ensure that the REPOSITORY_URL configured in the <AGENT_HOME>/sysman/config/emd.properties file has the correct hostname of the OMS machine.
Refer Note 737373.1: Communication: Agent to OMS Communication Fails if the Agent's REPOSITORY_URL Parameter has Incorrect Value
2. If the OMS is secured and locked (accepts uploads only in the https mode), then secure the Agent also.
Refer:
Note 428874.1: How to tell if the EM OMS is locked or unlocked?
Note 283091.1: How To Secure / Unsecure The Grid Control Components (Agent / OMS) In 10gcd <AGENT_HOME>/binemctl secure agent
This will prompt you for the Agent Registration password, which is needed for secure operation to complete.
If the Agent Registration password is not known, create a new one using the steps in
Note 285490.1: Grid Control Security: How to Create / Edit the Agent Registration Password for Agent to OMS Secure Communication?References
NOTE:398487.1 - Securing Grid Control Agent Fails with "Invalid Agent Registration Password" When the Registration Password is Incorrect
相关内容
问题5:GC安装失败后重装问题

1.11删除SYSMAN和SYSMAN_MDS用户
SQL>SELECT USERNAME FROM ALL_USERS WHERE USERNAME IN ('SYSMAN','SYSMAN_MDS');
USERNAME
-------------------------
SYSMAN
SQL>SELECT FILE_NAME FROM DBA_DATA_FILES WHERE UPPER (TABLESPACE_NAME) LIKE 'MGMT%';
no rows selected
如果只有SYSMAN用户,则使用如下方法删除:
$$ORACLE_HOME/bin/emca -deconfig dbcontrol db -repos drop -SYS_PWD 'iamENCY3' -SYSMAN_PWD 'iamENCY3'
...
Enter the following information:
Database SID:EMREP
Listener port number:1521
Do you wish to continue? [yes(Y)/no(N)]:y
...
如果还含有SYSMAN_MDS用户,则使用如下方法删除(要求安装了OMS后操作):
$ export LD_LIBRARY_PATH=$OMS_HOME/lib
$ $OMS_HOME/sysman/admin/emdrep/bin/RepManager <repository_database_host> <repository_database_port> <repository_database_sid> -action dropall -dbUser <repository_database_user> -dbPassword <repository_database_password> -dbRole <repository_database_user_role> -mwHome <middleware_home> -mwOraHome <oms_oracle_home> -oracleHome <oms_oracle_home>
最后手工删除数据文件:
$ rm -rf FILE_NAMEHotel02:
Db:old psu
Gi:old psu
Agent:old psu


问题6:同样是问题4出现的错误,这次重新启动agent后正常
[oracle@gc bin]$ ./emctl status agent
Oracle Enterprise Manager 11g Release 1 Grid Control 11.1.0.1.0
Copyright (c) 1996, 2010 Oracle Corporation. All rights reserved.
---------------------------
Agent Version : 11.1.0.1.0
OMS Version : 11.1.0.1.0
Protocol Version : 11.1.0.0.0
Agent Home : /home/oracle/Oracle/Middleware/agent11g
Agent binaries : /home/oracle/Oracle/Middleware/agent11g
Agent Process ID : 4083
Parent Process ID : 4054
Agent URL : https://gc.localdomain:3872/emd/main/
Repository URL : https://gc.localdomain:4900/em/upload
Started at : 2011-08-15 08:47:37
Started by user : oracle
Last Reload : 2011-08-15 09:43:21
Last successful upload : (none)
Last attempted upload : (none)
Total Megabytes of XML files uploaded so far : 0.00
Number of XML files pending upload : 56
Size of XML files pending upload(MB) : 7.60
Available disk space on upload filesystem : 20.61%
Last attempted heartbeat to OMS : 2011-08-15 09:44:23
Last successful heartbeat to OMS : unknown
---------------------------
Agent is Running and Ready
[oracle@gc bin]$ ./emctl upload agent
Oracle Enterprise Manager 11g Release 1 Grid Control 11.1.0.1.0
Copyright (c) 1996, 2010 Oracle Corporation. All rights reserved.
---------------------------
EMD upload error: uploadXMLFiles skipped :: OMS version not checked yet. If this issue persists check trace files for ping to OMS related errors.
[oracle@gc bin]$ ./emctl stop agent
Oracle Enterprise Manager 11g Release 1 Grid Control 11.1.0.1.0
Copyright (c) 1996, 2010 Oracle Corporation. All rights reserved.
Stopping agent ... stopped.
[oracle@gc bin]$ ./emctl start agent
Oracle Enterprise Manager 11g Release 1 Grid Control 11.1.0.1.0
Copyright (c) 1996, 2010 Oracle Corporation. All rights reserved.
Starting agent ................ started.
[oracle@gc bin]$ ./emctl status agent
Oracle Enterprise Manager 11g Release 1 Grid Control 11.1.0.1.0
Copyright (c) 1996, 2010 Oracle Corporation. All rights reserved.
---------------------------
Agent Version : 11.1.0.1.0
OMS Version : 11.1.0.1.0
Protocol Version : 11.1.0.0.0
Agent Home : /home/oracle/Oracle/Middleware/agent11g
Agent binaries : /home/oracle/Oracle/Middleware/agent11g
Agent Process ID : 9437
Parent Process ID : 9399
Agent URL : https://gc.localdomain:3872/emd/main/
Repository URL : https://gc.localdomain:4900/em/upload
Started at : 2011-08-15 09:46:37
Started by user : oracle
Last Reload : 2011-08-15 09:47:15
Last successful upload : (none)
Last attempted upload : (none)
Total Megabytes of XML files uploaded so far : 0.00
Number of XML files pending upload : 65
Size of XML files pending upload(MB) : 8.27
Available disk space on upload filesystem : 20.60%
Last successful heartbeat to OMS : 2011-08-15 09:47:03
---------------------------
Agent is Running and Ready
[oracle@gc bin]$ ./emctl upload agent
Oracle Enterprise Manager 11g Release 1 Grid Control 11.1.0.1.0
Copyright (c) 1996, 2010 Oracle Corporation. All rights reserved.
---------------------------
EMD upload error: Upload timed out before completion.
Number of files to upload before the upload: 83, total size (MB): 7.46.
Remaining number of files to upload: 83, total size (MB): 7.46.
[oracle@gc bin]$ ./emctl upload agent
Oracle Enterprise Manager 11g Release 1 Grid Control 11.1.0.1.0
Copyright (c) 1996, 2010 Oracle Corporation. All rights reserved.
---------------------------
^C[oracle@gc bin]$ lsnrctl status
LSNRCTL for Linux: Version 11.2.0.2.0 - Production on 15-8月 -2011 09:49:23
Copyright (c) 1991, 2010, Oracle. All rights reserved.
正在连接到 (DESCRIPTION=(ADDRESS=(PROTOCOL=TCP)(HOST=gc.localdomain)(PORT=1521)))
LISTENER的 STATUS
------------------------
别名 LISTENER
版本 TNSLSNR for Linux: Version 11.2.0.2.0 - Production
启动日期 15-8月 -2011 09:42:02
正常运行时间 0天 0小时 7分 21秒
跟踪级别 off
安全性 ON: Local OS Authentication
SNMP OFF
监听程序参数文件 /u01/app/ora11g/product/11.2.0/db_1/network/admin/listener.ora
监听程序日志文件 /u01/app/ora11g/diag/tnslsnr/gc/listener/alert/log.xml
监听端点概要...
(DESCRIPTION=(ADDRESS=(PROTOCOL=tcp)(HOST=gc.localdomain)(PORT=1521)))
(DESCRIPTION=(ADDRESS=(PROTOCOL=ipc)(KEY=EXTPROC1521)))
服务摘要..
服务 "gcdb"包含 1个实例。
实例 "gcdb",状态 READY,包含此服务的 1个处理程序...
服务 "gcdbXDB"包含 1个实例。
实例 "gcdb",状态 READY,包含此服务的 1个处理程序...
命令执行成功
[oracle@gc bin]$ ./emctl upload agent
Oracle Enterprise Manager 11g Release 1 Grid Control 11.1.0.1.0
Copyright (c) 1996, 2010 Oracle Corporation. All rights reserved.
---------------------------
EMD upload completed successfully
问题6:卸载agent
Agent is Not Running
[oracle@oel01 bin]$ export LANG=en_US
[oracle@oel01 bin]$ cd ..
[oracle@oel01 agent11g]$ cd oui/bin/
[oracle@oel01 bin]$ ./runInstaller -silent -deinstall -removeallfiles -removeAllPatches REMOVE_HOMES="{/u01/app/agent11g}"
Starting Oracle Universal Installer...
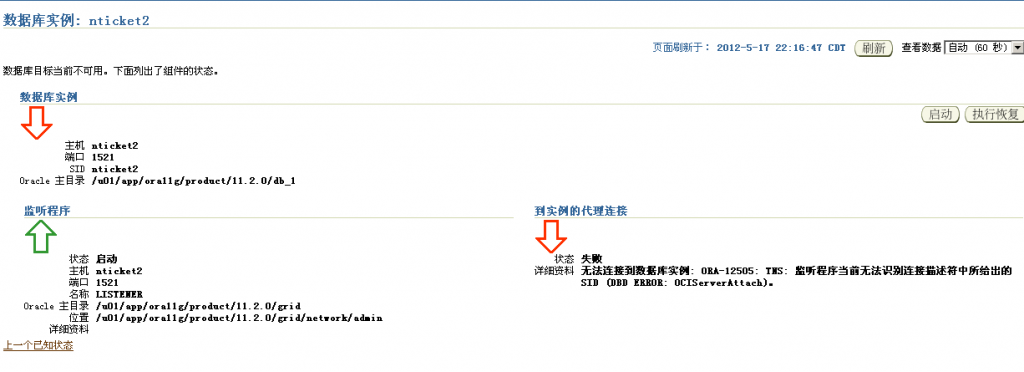
问题7:安装完db,gi后,gc显示监听没有启动
当安装完db,gi软件(不建库)后,grid control显示监听没有启动,而且手动启动一直处于挂起状态。


解决:当创建完数据库后,监听状态会自动显示正常
参考matalink文档:
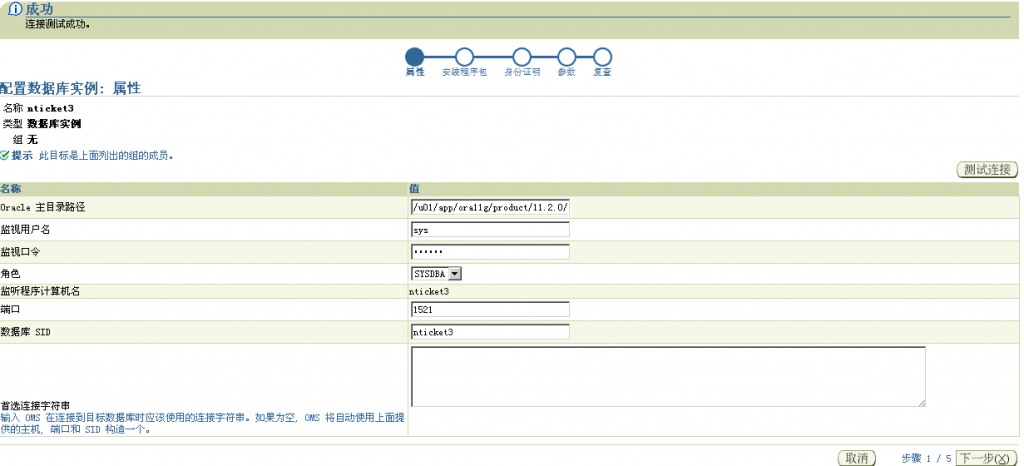
问题8:修改sys密码后grid control无法连接数据库,无监控数据。


原因:
当修改数据库(主备)的监控用(sys)户密码后,当grid监控资料库的无法再通过以前的用户验证,所以要重输入一次监控用户的新密码,保存到资料库。
解决办法:


重新输入密码测试连接。
- If the SYSMAN password is provided on the command line, this operation fails with:


