OSGi器配置步
1.File → new → project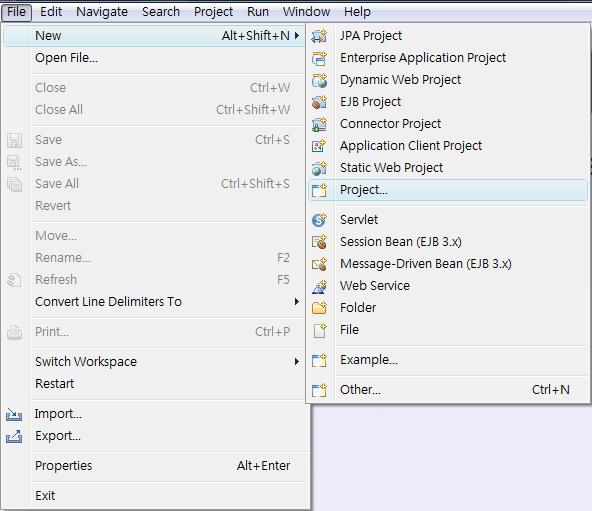
2. Plug-in project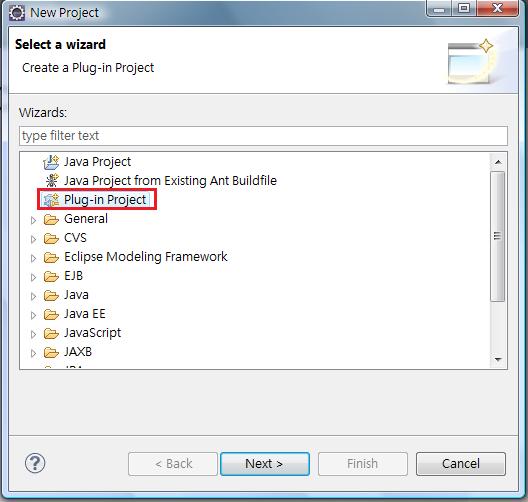
3.打入project name:com.puf.osgi.test
Target Platform an OSGi framework:Equinox
按下Next後Finish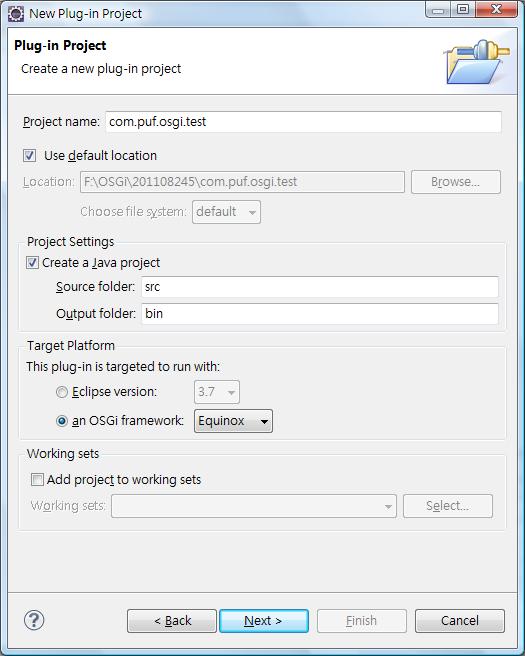
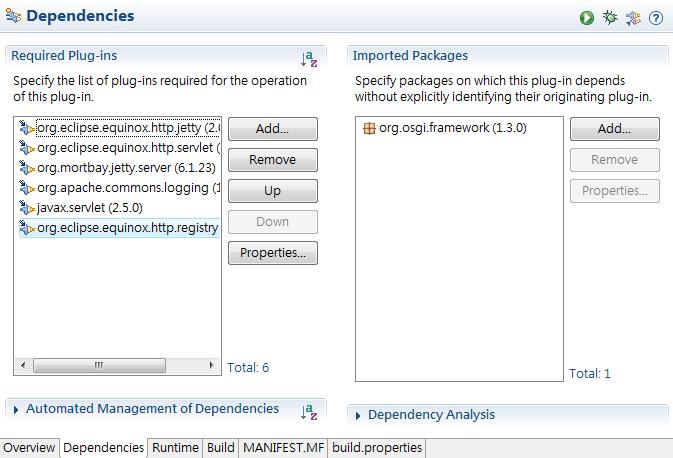
4.至MANIFEST Dependencies
至Required Plug-ins相依的Bundle
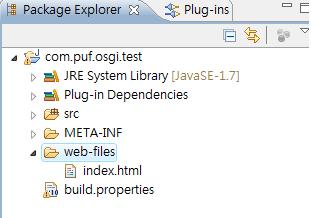
5.至com.puf.osgi.test下新增web-files料,在料下新增一index.html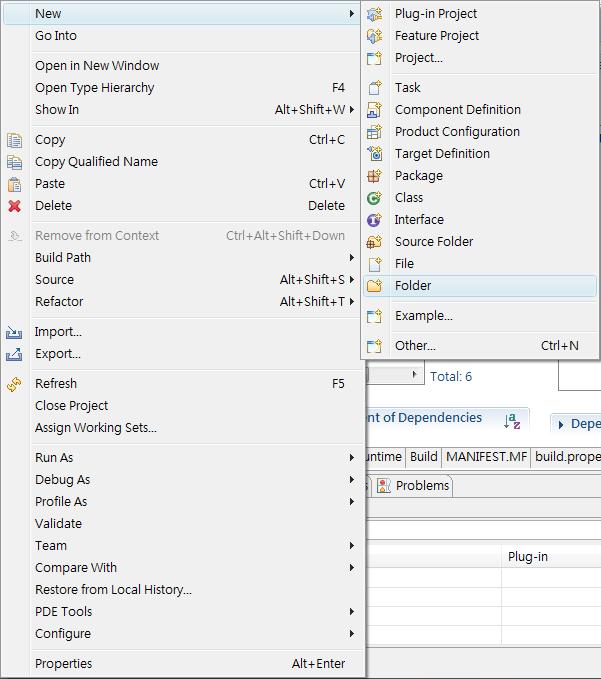


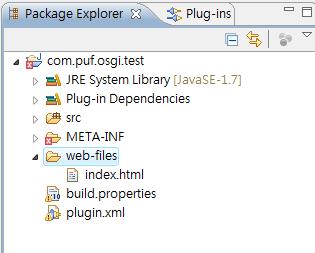
6.在com.puf.osgi.test下新增一plugin.xml案,案容
<plugin> <extension point="org.eclipse.equinox.http.registry.resources"> <resource alias="/web" base-name="/web_files" /> </extension> </plugin>
7.MANIFEST.MFBundle-SymbolicName出,在後面加上singleton:=true即可
Manifest-Version: 1.0Bundle-ManifestVersion: 2Bundle-Name: TestBundle-SymbolicName: com.puf.osgi.test;singleton:=trueBundle-Version: 1.0.0.qualifierBundle-Activator: com.puf.osgi.test.ActivatorBundle-Vendor: PUFBundle-RequiredExecutionEnvironment: JavaSE-1.7Import-Package: org.osgi.framework;version="1.3.0"Require-Bundle: org.eclipse.equinox.http.jetty;bundle-version="2.0.100", org.eclipse.equinox.http.servlet;bundle-version="1.1.200", org.mortbay.jetty.server;bundle-version="6.1.23", org.apache.commons.logging;bundle-version="1.0.4", javax.servlet;bundle-version="2.5.0", org.eclipse.equinox.http.registry;bundle-version="1.1.100"
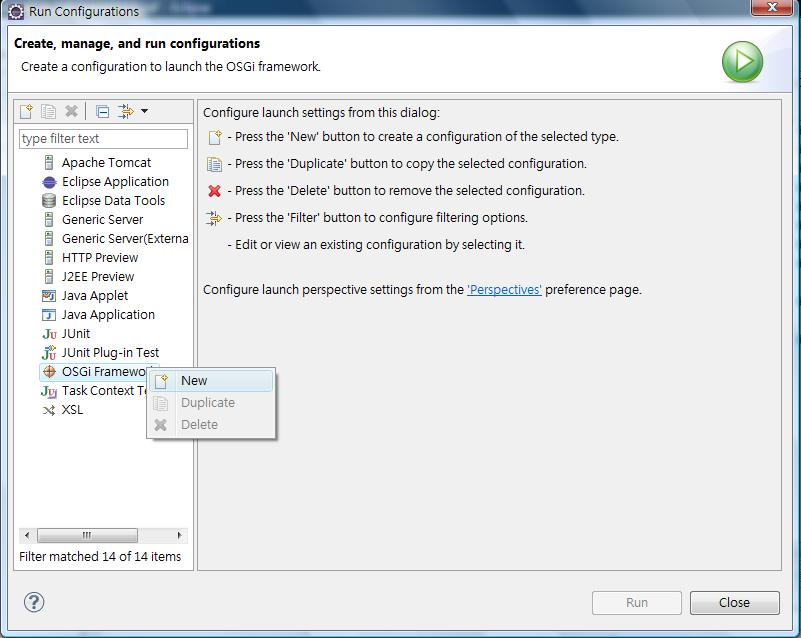
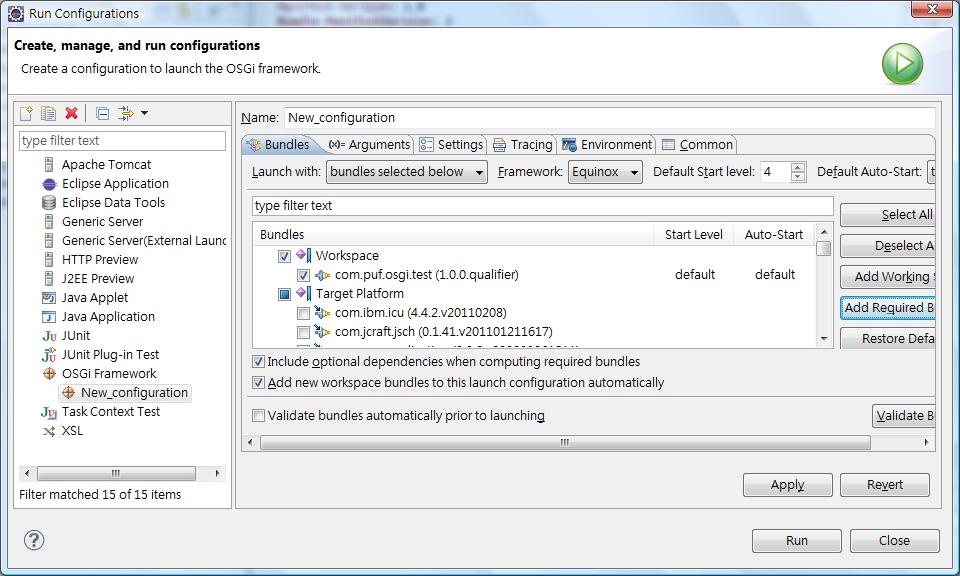
8.至Run → Run configurations OSGi Framework 右 New
Deselect All com.puf.osgi.test 打勾,在Add Required Bundles
按下 Run
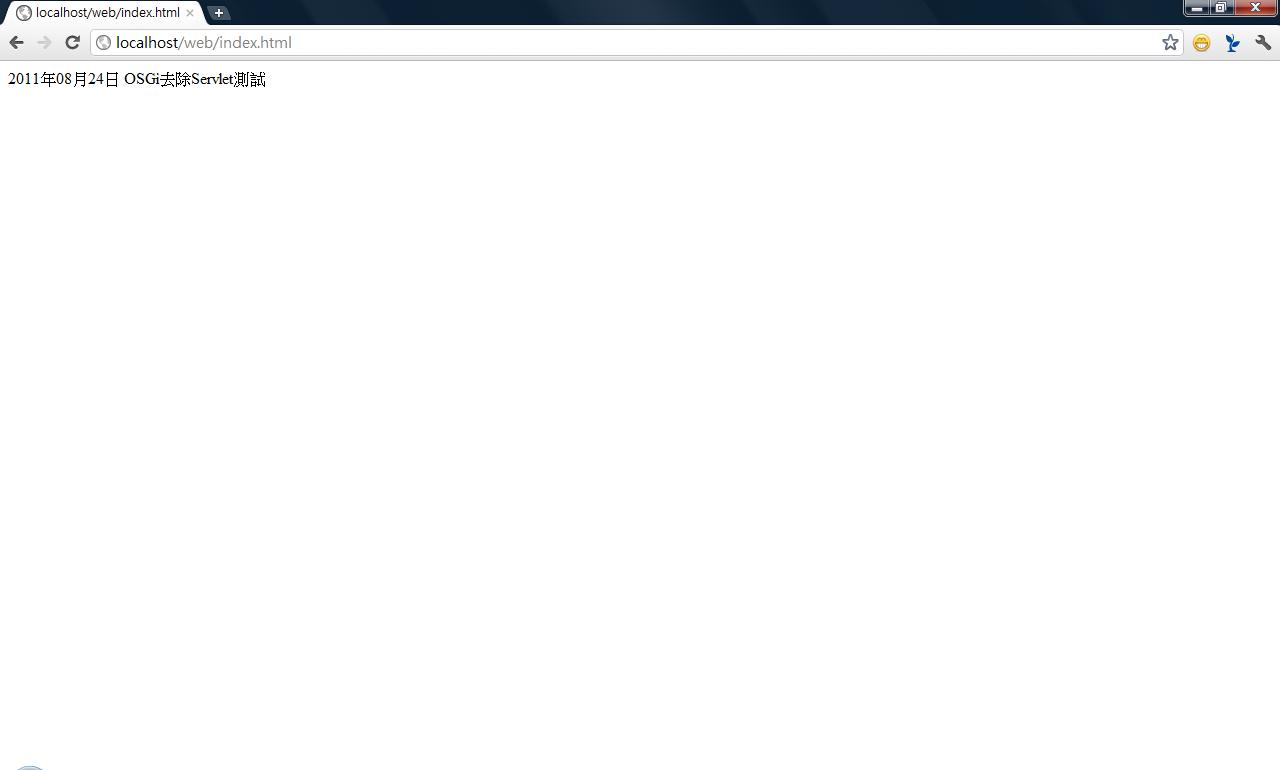
9.在至Run → Debug 後,器打入 http://localhost/web/index.html 即可
考址:http://developer.51cto.com/art/200906/126290.htm